Implants made simple: Part 1
By Steven Pigliacelli, CDT, MDT
Case planning
In order to achieve the desired goal for any implant restoration, the restorative team must case-plan from the beginning. It is vital that all factors are taken into consideration and that all roadblocks and obstacles are addressed prior to starting any implant restoration. Only a few simple steps are required. Communication between the patient and restorative team, which includes the restorative dentist, the periodontist or oral surgeon, and the lab, is imperative.
First, a few questions should always be asked. What is the desired result? Why is the patient in need of the implant? Is the patient a bruxer? Can implants even be successfully placed in the patient’s mouth? Is there enough vertical room? Is there enough bone?
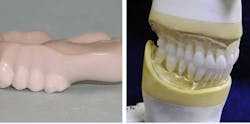
Many of these questions can be answered with diagnostic wax-ups on duplicated models. The lab can supply varied preliminary wax-ups to show different case designs and options. The restorative doctor must take accurate bites on accurate models. After the lab makes the wax-ups and provides a pre-estimate on varied case designs, the dentist, with the periodontist or surgeon, can agree upon the best direction to take.
Diagnostic wax-up
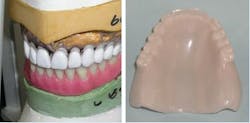
In order to make a proper guide, an edentulous model is required. Take an alginate impression of the arch that will anchor the guide. Send it to the lab for a custom tray. Take a final border-mold style impression of the edentulous arch. Treat it the same as if a full denture is being made. Every detail that is required for a full denture is also required for the guide. Shortcuts will result in an ill-fitting guide, which will result in an incorrectly placed implant in the mouth. Therefore, the final prosthesis will not fit. Send the impression to the lab and have a bite rim made.
A stabilized bite rim is necessary in order to get the proper bite for the guide fabrication. Take the bite in the same manner as if making a full denture. Mark the midline, check the vertical, and take measurements for denture teeth. If models already exist, then only have a bite rim made. A good counter model and any study models should be supplied, along with the bite rim and final master model.
Pre-existing models are usable unless they are chipped or broken. A quadrant model is never an option.
CT scanning appliance
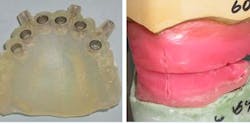
This is where the guide comes into the picture and where the rest of the questions will be answered. Stereolithographic Surgical Guides in conjunction with CT-scan-based treatment planning software makes implant placement simple and more predictable, thus decreasing both the cost and the need for so many extra steps of restorations done without guides. There are many surgical guide systems with various designs that can accommodate almost every implant manufacturer.
The wax-ups can be used as the matrix for the guide. A CT scan guide in conjunction with varied marking systems, such as gutta percha, amalgum, barium sulfate, or barium denture teeth, can be used.
The CT scan can be merged with surgical simulation software such as Straumann® CARES® Codiagnostix, NobelBiocare® NobelClinician™, Materialise Dental, Inc. SimPlant®, and the many other systems on the market today.
The final case can be simulated on the computer to determine correct abutment choice and angulations of the implants as well as the depth and length of the implants.
At this point the restorative dentist can put all his or her compiled data together and decide which case design appears to be the best. In some cases, implants are not an option and another restoration is necessary. That is the beauty of pre-case planning. It is so much more desirable to find out prior to placing the implants than to find out after taking the impressions that a case design will be compromised. The patient is then given the restorative options and told upfront if any limitations or exceptions will arise in the final restoration. The lab fee and restorative fee are combined to give the patient the final cost, and payment options can be presented.
Surgical guide
If implants are the desired option, the CT scan will then be converted to a surgical guide, which will aid the surgeon/periodontist in placing the implants. Since everything was carefully planned and all obstacles addressed, the surgery should be relatively simple. Another option is Stereolithographic model from the CT scan data, which enables a model-based surgical guide to be produced. From here the guide can be modified by hand to fit on the model, and guide sleeves can be manually placed.
Once these steps have been followed the implant should be in the ideal location for the final restoration. In the event that the bone does not allow the implant to be placed ideally, the final restoration can be planned on the not ideal position. Most implant manufacturers make pre-angled machined modification abutments for off-angled implants. When planning the restoration on the computer these abutments may be placed in anticipation of the problem. In some cases the implant may need to be placed on a more severe angle due to the pre-made angle correction of the abutment. The comment, “That’s where the bone was” should be a thing of the past. If desired, the implant can be loaded with temporaries at first stage surgery using a provisional bridge made at the time of the guide fabrication.
A variation of the old adage “Measure twice and restore once” proves that pre-case planning can truly make implants simple.
-------------------------------------------------------
ALSO BY STEVEN PIGLIACELLI:
Top 5 questions you should ask a dental lab before you send them a case
The fall and rise of dental technology
The changing face of dentistry
--------------------------------------------------------
Steven Pigliacelli, CDT, MDT, has more than 30 years experience with Marotta Dental Studio as a dental implant specialist. Steven is a faculty instructor in Post-Graduate Prosthodontics at New York University, College of Dentistry. He manages Marotta Dental Studio and is the technical liaison between the dentist and laboratory for case planning, telephone support, and quality control. He directs the GPR and Prosthetic Resident Rotation at Marotta Dental Studio, an intensive educational program that focuses on dental technology and the value of the technician/dentist relationship. Steven writes all of Marotta’s educational and promotional materials. He is president of the American Academy of Dental Prosthetic Technicians, president of the Greater New York Academy of Prosthetic Technicians, vice president of the Ethical Dental Laboratory Alliance, and program director for the New York Institute for Advanced Dental Studies. Steven has published in dental journals, and he lectures and performs hands-on demonstrations at study clubs and seminars.


