David Scardella, DMD, explains why he chose to purchase a CBCT system—and specifically the Planmeca ProMax 3D Classic—after just five months of owning his general practice.
Why did I buy a CBCT system after only five months of practice ownership? The short answer is dental implants. I love placing implants, and I knew I wanted implants to be a significant part of my practice. My first taste of implant surgery happened during my general practice residency at the VA Medical Center in Washington, DC. The attending GPs and specialists trained the residents from both restorative and surgical perspectives. We were fortunate enough to have a CBCT system in the clinic and took preoperative scans of all our potential implant cases. Even though we didn’t venture into guided surgery, I found the information from the cone-beam scan to be invaluable in evaluating edentulous sites.
The purchasing decision
Prior to owning a CBCT system, I found myself regularly sending patients for 3-D images provided by a mobile scanning company. My patients were charged almost $400, and the van arrived late more often than not. After a while, we became frustrated with the tardiness of one company and tried a new company. However, they cancelled on a patient last minute due to car trouble. This was not the image I wanted for my practice.
It made sense to purchase my own unit. The cost is manageable and can easily be offset by the fee for each scan and the increased number of implant cases planned using this technology. I looked at three CBCT machines before deciding which one to purchase. Ultimately, I bought the Planmeca ProMax 3D Classic unit based on a few key factors: cost, ease of use, image quality, and support. While there are a growing number of other excellent options on the market, I kept my search manageable by only looking at three options.
I was able to purchase a refurbished machine at a reduced price and use money from the sale of my existing pan system as a down payment. My monthly payments are $1,323 for a 72-month term. Even as a new practice owner, I found this to be a reasonable expense considering the sizable upgrade in technology. Over the past eight months, my office billed for 40 CBCT scans. At $250 per scan, that’s $10,000. The sum of the monthly payments over that time was only slightly more the money earned from the scans. My office is small, with only three chairs—one part-time hygienist and me. In a larger practice, one could easily double or triple the number of scans being taken.
Using CBCT for dental implants
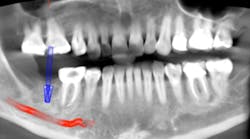
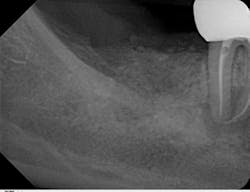
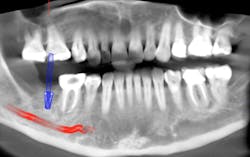
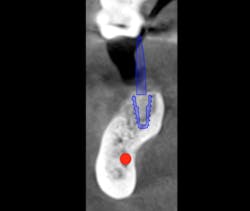
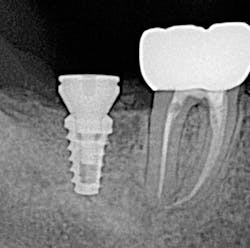
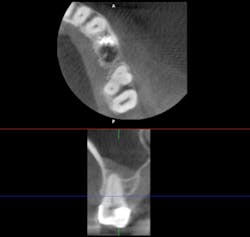
The old saying “you don’t know what you don't know” holds especially true in regard to 3-D radiology. You simply cannot gain the same amount of information from 2-D images. My main use for CBCT in the general dentistry practice is dental implant planning. In order to feel confident placing dental implants, I need this technology. I am able to identify cases that are appropriate for my skill level, as well as cases that are more difficult and should be referred. Whether a case will be tricky is not always obvious from a 2-D image and clinical exam. I also have not found a situation where less information was more beneficial than more information. I have never thought to myself, “I wish I didn’t have a 3-D scan of this patient.” Conversely, there were many times before buying my CBCT when I wished I had more than just a 2-D periapical (PA) or pan. The case shown in figures 1, 2, and 3 illustrates how the additional information CBCT provides aids in planning and placing dental implants.
Figure 3 tells a more complete story. The patient has a significant lingual concavity. I was unable to palpate the concavity clinically to realize its full extent. The 3-D image allows accurate measurement to the inferior alveolar nerve (IAN) and lingual concavity. It allows me to plan and place an implant of the appropriate length to avoid perforation of the lingual plate, which could lead to serious surgical complications.
3-D technology makes planning implant cases easy and accurate. It’s safer for my patients and gives me the confidence to properly evaluate the edentulous site(s). Although CBCT is not the standard of care (yet), I personally wouldn’t want an implant placed in my mouth without a preoperative cone-beam scan. I also take this into account when referring difficult implant cases to specialists. I prefer that they value 3-D images as much as I do.
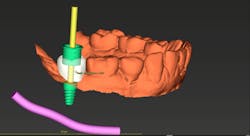
As my implant experience grows, I find myself ordering CBCT-based surgical guides more often. When used properly, a guide can make the procedure shorter, safer, and less stressful for both the doctor and the patient. I am a firm believer in placing screw-retained restorations whenever possible; preplanning my surgery with a digital wax-up and using a surgical guide ensures that the implant is in the optimum restorative position (figures 4–5). Even though an experienced surgeon with top-notch clinical skills can place an implant in an acceptable position most of the time, there is no way they can place it in a better position than with a surgical guide. They can only hope to do as well—not better.
Using CBCT for endodontics
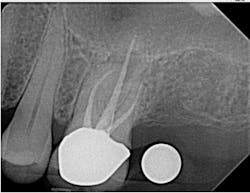
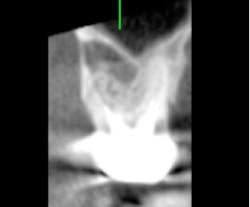
I also use my ProMax 3D Classic for endodontic evaluation and treatment when needed (figures 6–8). A small field of view (5 cm x 5 cm) image can be taken to limit radiation exposure and focus on the tooth in question. It has come in handy when looking for the second mesiobuccal (MB2) canal in maxillary molars and makes identifying periradicular lesions much easier than periapical radiographs.
While the ProMax 3D Classic has various applications, including endo and extraoral bitewings, I primarily use it for implant planning. But even if that were all it did, it would still be worth the investment for my practice. If you place dental implants, I strongly recommend that you at least have access to a CBCT system if you don't have one in your own office. You’ll be amazed by what you were missing while you were living in the 2-D world.
Author's disclosure: Dr. Scardella has no financial interest in any of the products or companies mentioned in the article.
Editor's Note: This article first appeared in Pearls for Your Practice: The Product Navigator.Click here to subscribe. Click here to submit a products article for consideration.
