Until the popularization of self-etch adhesives in the late 1990s, dentists had to rely almost exclusively on the total-etch technique. While this procedure results in strong enamel bonding, we know it can also be very technique-sensitive and involves several bottles and steps. Therefore dentists welcomed the introduction of one-bottle, self-etching materials. Although these materials typically involve some sacrifice of bond strength, they come with a lower risk of postoperative sensitivity and have a more straightforward technique. However, add in the additional concept of selective enamel etching, and it’s easy to see why bonding techniques have become so confusing. In order to have the right material on hand for any given patient situation, many dentists have found themselves having to stock multiple adhesive systems and their various components, leading to inefficiency, waste, and confusion between bottles and techniques.
RELATED |Streamlining adhesion with universal bonding agents
The introduction of a universal adhesive, 3M™ ESPE™ Scotchbond™ Universal Adhesive, has the potential to address this problem in many offices. This adhesive is suitable for self-etch, total-etch, and selective-etch techniques, with a simple procedure and one-bottle formula. Once any desired phosphoric acid etching is completed, dentists can simply apply Scotchbond Universal adhesive and follow the “20-5-10” rule: scrub in for 20 seconds, air dry for five seconds or until the adhesive doesn’t move, and light cure for 10 seconds.
RELATED |"A trifecta where everyone is a winner"
This is the first in a three-article series that will demonstrate the use of Scotchbond Universal Adhesive in each possible etching situation. This article will illustrate the product’s use in self-etch mode, Part II will demonstrate total-etch mode, and Part III will highlight the product in a selective-etch case.
Case selection for self-etch mode
I most often find myself using a self-etch adhesive in a case with nearly no enamel, such as a crown prep. However, the case shown here is a composite restoration, in which a self-etch technique was used due to the extreme depth of the cavity in order to avoid the risk of getting phosphoric acid near the pulpal area.
Case presentation
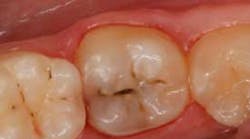
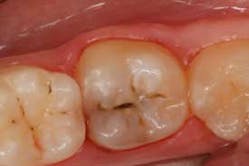
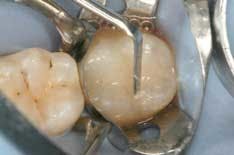
The patient presented with extensive caries on tooth No. 30 (Fig. 1). A rubber dam was placed and the decay was excavated, revealing its extension nearly to the top of the pulp chamber (Fig. 2).
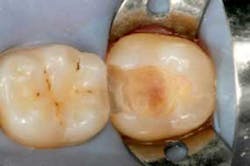
Scotchbond Universal adhesive was applied to the prep and rubbed in for 20 seconds (Fig. 3), then air-dried for five seconds (or until the adhesive didn’t move). The material was then light cured for 10 seconds.
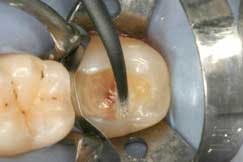
The composite layering process began with application of a thin layer of 3M™ ESPE™ Filtek™ Supreme Ultra Flowable Restorative to the bottom of the box, which was then light cured. Successive layers of 3M ESPE Filtek Supreme Ultra Universal Restorative in a body shade were then placed in a vertical incremental technique, with the material “buttered” against each side of the box and the layers individually light cured (Fig. 4). A final enamel layer was then placed on top of the restoration and light cured.
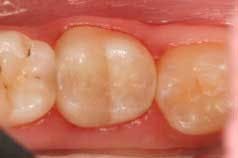
Final polishing was completed with 3M™ ESPE™ Sof-Lex™ Spiral Finishing and Polishing Wheels, leaving a very esthetic restoration with no sensitivity (Fig. 5).
Discussion
Many dentists would opt to place a liner/base in a case with such a deep excavation, but this was not done in this case due to my personal comfort level with the adhesive and the fact that the patient was experiencing no sensitivity in the area even prior to treatment. The bond strengths delivered by Scotchbond Universal Adhesive when used in self-etch mode are very satisfactory, and the system’s ease of use makes it appealing when an efficient technique is desired. The technique shown here represents a simple way to create a seal over deep dentin without fear of postoperative sensitivity, and without the extra steps of placing a base.Fig. 1: Extensive caries on No. 30
