Joshua Austin, DDS, FAGD, Editorial Director, interviewed Robert Margeas, DDS, FAGD, about his process for the final finishing of anterior composite restorations. Dr. Margeas shares his method, as well as the products that he uses to achieve a lustrous and natural finish.
Dr. Joshua Austin: Dr. Margeas, I’ve been to several of your courses, including lectures and hands-on workshops. You are an absolutely amazing clinician and a true artist. The final finish and surface texture of your esthetic composite restorations always blows me away in your cases. Tell me why surface texture is important with these types of restorations?
Dr. Robert Margeas: Surface texture is important because it’s natural. We should be trying to replicate nature. In order to do that, we need surface texture. Surface texture also affects the way that light reflects off of our restorations.
JA: How do you handle surface texture when it comes to finishing and polishing?
RM: There is a difference when it comes to finishing and polishing composite restorations. Finishing is usually done with diamonds, carbides, or stones, and it’s the stage when you can add surface texture to a restoration. Once you have created this surface texture, it’s very important not to lose it when you do the final polish.
JA: Polishing without losing surface texture seems like it can be a complex task.
RM: No. The steps I take in order to have the best surface texture—replicating enamel after the final polish—are simple to achieve. Once you have created the line angles, perikymata, and developmental depressions, you want to begin polishing.
JA: It’s been a little while since I took freshman Dental Anatomy. Can you remind me about what “perikymata” means?
RM: Perikymata are the small, transverse ridges on the surface of enamel. If you look at beautiful enamel with magnification and light, you will see them.
JA: Got it. So onto polishing: Hit me with your polishing steps.
RM: I always achieve the final polish with Enamelize and Flexibuffs from Cosmedent. Enamelize is an aluminum oxide polishing paste, and Flexibuffs are felt wheels. I apply Enamelize to the final surface using the Flexibuff disc in a circular motion—similar to how you might buff your car. A little goes a long way. You can get the best possible finish with an electric handpiece that has high torque and controlled speed.
JA: That seems way too simple! Do you have any photos you can show me to demonstrate this?
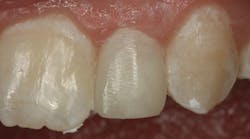
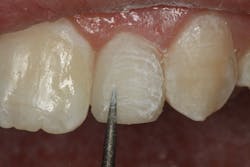
RM: Absolutely. Here you can see how the surface texture is achieved with a diamond bur:
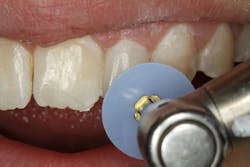
Here is an example of a Flexibuff disc applying Enamelize in a circular motion:
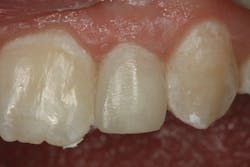
And here is a photo showing the final polish, which has a great deal of luster but no loss of surface texture:
JA: Wow. Beautiful! Once again, you have left me speechless. Thanks again!
RM: Any time, brother!
___________________________________________
ARTICLES BY DR. MARGEAS:
The changing patient
Choices of metal-free restorations
___________________________________________
Robert Margeas, DDS,FAGD, is board-certified by the American Board of Operative Dentistry. He maintains a private practice with a focus on comprehensive esthetic restorative dentistry in Des Moines, Iowa, and has been restoring implants since 1988. Dr. Margeas can be reached at [email protected].
