Provisionals Made Easy
Learn how to do them correctly the first time.
WRITTEN BY Lee Ann Brady, DMD
Exquisite provisionals are key to predictable, beautiful, long-lasting clinical results. Is there anything in dentistry more psychologically disconcerting and unproductive than redoing your own clinical failures? For me, the answer is a definite “no,” and as I began searching for the answer to reducing failure and frustration in my practice, I kept coming back to provisionals. Now, let’s be clear about one distinction, this is not an article about temporaries.
A temporary is a protective covering for a prepared tooth that bridges time (usually as short as we can make it) between preparation and insertion. Provisionals accomplish the same goal of covering the prepared tooth to prevent sensitivity and keep the relative position of the tooth in the arch stable. Provisionals also do much more. Beyond the semantics lies a fundamental shift in our thinking that allows us to see an interim acrylic restoration as an essential diagnostic tool and therapeutic modality.
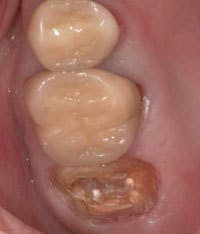
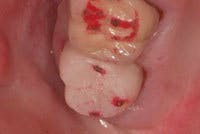
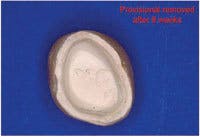
Protecting the prepared tooth is a core responsibility of the provisional restoration. Research tells us that the primary causative factor in pulpal death is introduction of bacteria. As we look at the relative size of the bacteria as compared to the size of dentinal tubules and the increasing number of tubules by surface area as we travel from the surface of the tooth inward, preventing leakage of oral fluids under an interim restoration becomes critical. This can only be accomplished by creating a marginal seal and adaptation equal to that of the final, as evidenced by unmarred cement upon removal of the provisional. If we are successful, we also will have created an environment that allows the patient to function without sensitivity. Stability within the arch ensures that you will maintain the intertooth and interarch relationships as they are represented to your ceramist on the working model.
I strive to create ideal tooth form and interproximal contacts to create an optimal environment for tissue health and oral hygiene. For patients who present with combined restorative and periodontal concerns, provisionals are a therapeutic tool to encourage optimal tissue health, evaluate tissue response, and direct tissue development. Creating anatomic gingival embrasures, emergence profile and heights of contour, in addition to marginal adaptation in the presence of good oral hygiene, allow optimal tissue response and healing.
Following adequate time to assess the tissue and complete the adjunctive periodontal procedures if necessary, I reevaluate my margin placement prior to finalizing the restorations, feeling confident that the relationship between marginal position and crestal tissue will remain stable. The periodontist and I work together using provisionals to direct tissue development for creation of ovate pontic sites, following implant placement, and to facilitate crown-lengthening procedures.
Additionally, I use provisionals in restorative cases that require esthetic crown-lengthening as both the surgical guide and to ensure optimal esthetics during healing. Using a diagnostic wax-up, the teeth are provisionalized following placement of the crestal tissue using an electrosurge (lasers, scalpels, and diamond burs also work). The periodontist can now flap the tissue and place the crestal bone to create adequate biologic width using the restorative margin as the guide, and the patient doesn’t have the sensitivity and esthetic concerns of exposed root surfaces and high and dry margins.
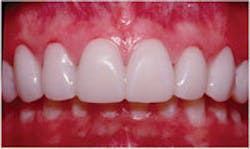
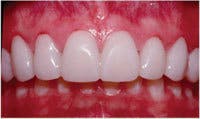
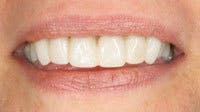
Provisionals are my blueprint for esthetic changes that allow the patient and me to have absolute control over the esthetic parameters of the case and no surprises at delivery. I create a diagnostic wax-up based on discussions with the patient around his or her esthetic concerns and goals. I find it extremely helpful for the patient to bring me two to four photos or magazine clippings of smiles that they find attractive. This creates a visual representation for me of the tooth shape and alignment and smile characteristics a patient seeks without the struggle of using words.
Using this template, I create the provisional restorations and allow the patient to experience the esthetic and phonetic changes. The patient and I then re-evaluate the restorations, and any esthetic or phonetic changes are made, and the patient tests these.
As we move through the process of evaluation, I use digital photography and work through an esthetic work-up of the provisionals to make sure we have met the original goals. Photographs also are valuable for patient communication about the restorations, and if a patient requests changes, I snap a photo, print a copy, and ask the patient to draw the changes for me on the photo.
Once the patient and I are both thrilled with esthetic and functional designs of the provisionals, I take impressions of the provisionals, preps, opposing arch, facebow transfer, and bite registration. The models are mounted on an articulator and sent to the ceramist along with incisal edge guides. Now the ceramist can use the provisional restorations as a blueprint and recreate the esthetic and functional parameters exactly.
As a blueprint, provisionals also verify the functional design parameters of a case prior to finalization. I use my provisionals to create the occlusal relationships and anterior guidance based on my original diagnostic work-up. Over time, I monitor the provisionals for cracks, breakage, decementation, and wear. Given the opportunity, the interim restorations will direct me to re-evaluate the occlusal design of the restorations in order to assure success of the final case. I create that opportunity for learning by scheduling final impressions separately from the preps, usually by a minimum of six to eight weeks.
As a diagnostic tool, I incorporate provisionals routinely in my practice. They are an integral part of the protocol I use for assessing cracked teeth that require full-coverage restorations. They enable me to evaluate symptom response to our proposed treatment and the potential need for endodontic therapy. I also use provisionals to help clarify restorability in borderline situations before I condemn teeth to being lost.
When I use interim restorations as a tool and allow them the time to direct me to parameters of the case that need to be evaluated and altered, I can move to the final restorations confident of predictable, long-term results. Exquisite provisionals have also built my practice referrals. The time and care I take to develop esthetics and function equal to the final restorations differentiates me and my practice to both patients and the specialists to whom I refer.
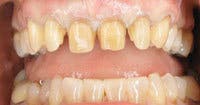
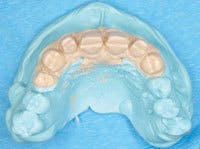
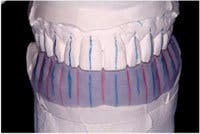
Creation of exquisite interim restorations begins with a comprehensive evaluation and diagnostic work-up of the case. I complete the diagnostic work-up and establish the esthetic and functional parameters of the case, and then use a master wax technician to finalize and add the anatomic detail. Using a duplicate stone model of the wax-up, a putty matrix is created using silicone lab putty, and then relined over the work-up model with light-body VPS material to capture all of the fine anatomy that was carved in. The matrix should capture anatomy on both sides of where teeth will be prepared, as well as adequate soft-tissue anatomy to ensure proper seating of the matrix on the preparation model.
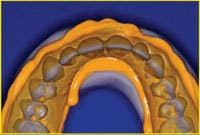
Following preparation, I obtain a retracted impression of the teeth using hydrocolloid to facilitate making the provisionals indirectly. This allows time and concentration to create an excellent result and allows the patient some time to relax. The impression can either be poured with a quick-setting stone or die silicone (this material will not work with VPS impressions), which is injected into the preps, and then the remainder of the impression is filled with bite-registration silicone. It must be turned over (not when I am using stone) on a counter to create a flat base. When the prep model is completed, fill the putty matrix with a methacrylate or bisacryl interim restorative material. With methacrylate, use a salt-and-pepper technique and layer different color acrylics into the matrix to create incisal translucency, body, and cervical shading. This can also be accomplished with some of the slower-setting bisacryl materials, or I commonly use a single light-shade bisacryl and tints to create the same color effects. Once the matrix is loaded with acrylic, place it over the prep model, seat to place with the model base against a countertop for resistance, and hold until the acrylic sets. Once the acrylic has set, remove the matrix. The provisional normally remains on the model and should be removed separately. For multiple-unit restorations, the flexibility of the die silicone model is an advantage because you can separate the provisional and model without causing fractures.
Following removal, check the provisional for voids, marginal integrity, and surface anatomy. When using a bisacryl, submerge the provisional in rubbing alcohol for 30 seconds to remove the air-inhibited layer prior to trimming and shaping. Then, remove the gross flash and excess using a carbide bur (H79E). Once this is accomplished, define the interproximal embrasures with a carbide bur (H261EF), then polish and finalize with a lab diamond (8860). Embrasures, both incisal and gingival, and anatomic contour are created using diamond disks (911HP followed by 934-180). These disks are used with a pulling motion that allow the flexibility of the disk and applied pressure to create a natural curve to the restoration.
The anatomy that was transferred to the restoration from the wax-up is enhanced using a carbide bur (H78E). Pay attention to surface texture and light angles. Once this is complete, a burlew wheel begins the polishing phase. The sharp edge of a new wheel allows access to the embrasures. Next, use fine sandpaper discs to smooth the interproximal areas of the provisional. Finally, polish using a fine flour of pumice and then polishing compound on handheld rag wheels. If the provisional is made from bisacryl prior to polishing, I use light-cured blue and ochre stains to create the incisal translucency, body, and cervical shading. Following staining, coat the provisional with a laboratory unfilled resin and cure for 90 seconds. ■
