Hawley appliances: what they can do for your dental practice
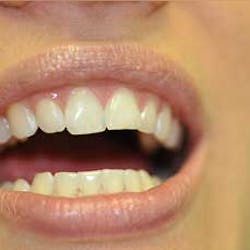
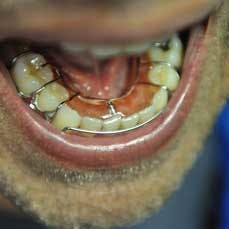
Fig. 1: Patient #1 desires minimal incisor movement only.
ALSO BY DR. MARIELAINA PERRONE | Orthodontic movement for the general dentist
Why would you want to learn more about treatment with Hawley appliances?
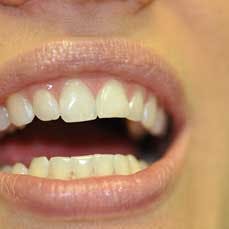
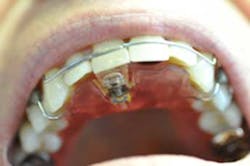
For starters, treatment with a Hawley appliance is relatively simple. Patient compliance and acceptance are high due to the short time and low cost, and treatment can be started in less than a week from initial workup. Many adults only want to fix a few front teeth that are out of alignment. The Hawley appliance is best for incisor movement only. They prefer that it is removable, in case of important social events, and if there is not a high dollar amount, patients are more likely to make the bigger investment to finish the cosmetic work after tooth movement.Fig. 2: Patient #2 is getting married in two months. Movement of Nos. 8, 9, and 10 required prior to cosmetic veneer placement.
How is it done?
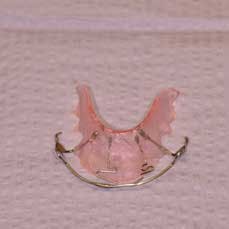
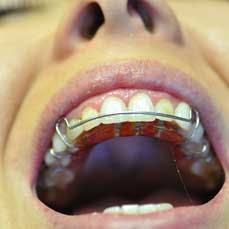
The appliance can be fabricated in an orthodontics lab in just a few days. The Hawley is then placed into the patient’s mouth and activated by the dentist in minutes. The appliance is adjusted weekly, or every other week in a quick 10-minute appointment slot. IPR (interproximal reduction) with a metal interproximal strip is done whenever contacts are tightening.Fig. 3: Patient #1 Hawley appliance with finger springs, and labial band.
Fabricated by Walstib-Cypress Ortho Lab.
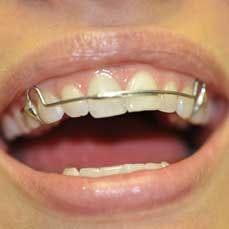
Fig. 4: Patient #1 wearing the activated appliance.
Getting started
Find some easy cases to start with. Moving a tooth that is in linguoversion to its correct facial positioning is easiest. Generally an advancement plate with a screw to be turned with a key turned once per week, or an expansion screw with a mini screwdriver to help rotate a tooth back into position will correct the issue.Fig. 5: Simple single tooth rotation utilizing a screw.
Fig. 6: Completed movement of central incisor with an advancement plate.
Exam and records
• Determine if the patient is a good candidate. Start with a thorough clinical exam, radiographs, study models, assess midlines, tooth and gingival symmetry, and take a bite registration.
• Assure good hygiene and dental health. Do not move teeth with periodontal issues, overly short roots, poor bone level, or decay.
• Assess oral habits such as nail biting, tongue thrust, and bruxism.
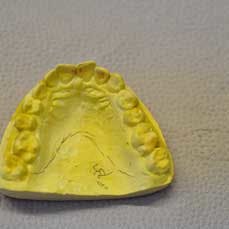
• Evaluate the space required in the arch. This is done by calculating the sum of the tooth widths distal of canine to distal of canine. The measurement will help determine how much space is available, and how much IPR will be necessary to move the tooth. Minimal IPR of .5 to 1 mm is easy to obtain with metal stripping at each visit. Flatter contacts will enhance the stability of tooth position after realignment is completed.Fig. 7: Lab model for patient No. 2
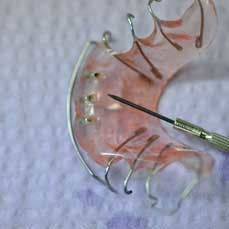
Fig. 8: Hawley appliance patient No. 2 with screws and mini screwdriver.
Fabricated by Walstib-Cypress Ortho Lab.
Fig. 9: Patient No. 2 wearing the Hawley appliance
Tools
Not many tools are required beyond the basic exam setup. The pliers do not need to be expensive; they are used briefly and last quite a long time.
• Bird beak pliers to tighten canine loops
• 3-prong pliers (to place bends in wires)
• Howe pliers to tighten labial bands
• Ortho bracket tweezers to grab and activate finger springs
• Colored wire marking pencil to mark before bending wire.
Laboratory prescriptions
The Hawley appliance consists of only a few components. A labial bow, canine loops, posterior retention (usually Adams clasps), labial bands, springs, screws, and advancement plates. When writing up your lab slip, simply draw in the desired movements with arrows to show desired rotational direction and buccal-lingual movements. Then draw in your labial bow with canine loops and end them palatally. If you know whether or not you want an advancement plate, screw, or finger spring, draw it in as well. Be sure to accurately describe what you are asking for in the notes area of the form. You may also want to speak with the lab technician directly to get his or her best opinion on how to proceed with the case. You can also just ask the lab to design it for you.
Movement tips
• Appointments are spaced out about once per week. Some patients are not as compliant and may need longer times between appointments. Appointments should be quick (in and out in less than 10 minutes).
• When you activate the appliance by advancing the screw, plate, or finger spring, start with gradual movements. If you overdo it, the appliance will not seat properly in the mouth. You may need to backtrack to get the appliance to seat properly.
• Tighten canine loops when you are trying to pull teeth together, or put pressure on a tooth at a wire bend area (usually mesial or distal to help rotate).
• IPR whenever floss is not passive, otherwise you may impede movement or cause another tooth to move out of alignment.
• Labial bands need to be gently bent as rotations start. Watch where the edge is; it may need to be shortened if it begins to hit the adjacent teeth.
• Patients need to wear the appliance as close to 24/7 as possible. After movement is completed, they will need to continue wearing retention 24/7 for a few months and can then wear it at nighttime only.
• Patients can wear the appliance, a fixed lingual retainer, or a clear splint retainer.
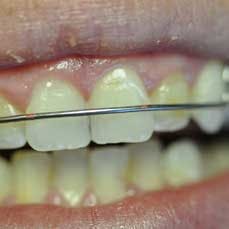
Fig. 10: Wire marked prior to bending. These bends will help rotate the incisors distally.
ConclusionRemember, if you build a relationship with your lab technician, he or she can guide you through the whole process. Take photos and ask lots of questions. The more of these appliances you do, the more comfortable you will become.
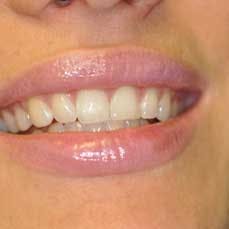
Fig. 11: Patient No. 1 with corrected incisor position in 10 weeks. Weekly adjustments.
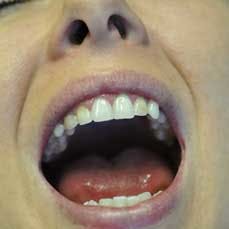
Fig. 12: Patient No. 2 with corrected incisor position in one month. Biweekly appointments. Patient is now ready to proceed with cosmetic veneers on Nos. 6, 7, and 10.
