Case report: Streamlined digital implantology using Implant Studio software and the Form 2 3-D printer
Sompop Bencharit, DDS, PhD, MS, FACP, and Daniel Whitley, DDS, FICOI, detail a case in which an implant was planned and placed using 3Shape's Implant Studio implant-planning software with the Form 2 3-D printer from Formlabs.
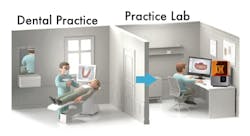
Both 3Shape A/S and Formlabs Inc. are giving dentists more options for digital dentistry products. Before, it seemed natural to us to use 3Shape's Implant Studio software with the Form 2 3-D printer. Now that Implant Studio and the Form 2 will be integrated with one streamlined workflow, clinicians can go from initial records to planned case with a fabricated surgical guide—all in one program with a few mouse clicks. (1–2)
Step No. 1: Capturing records with Trios and CBCT
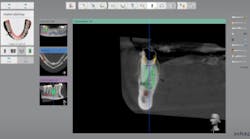
The first step is to capture initial records using the Trios intraoral scanner and CBCT. Any CBCT that exports in DICOM format can be used. Following the workflow that the Trios scanner prompts, capture both of the patient's arches and the patient's occlusion (figure 1). This information is saved in the 3Shape Dental Desktop and can be accessed when the Implant Studio module is opened. This allows for efficient capturing of patient records that can be fully evaluated when you are ready to begin planning the case.
Step No. 2: Planning in Implant Studio and printing with the Form 2
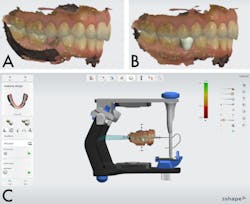
After the initial records have been acquired, it is time to start planning the case in Implant Studio. The software will take you through a user-friendly workflow with prompts that help ensure accuracy at critical steps. This workflow is initiated by entering the Implant Studio module and choosing to either plan the case in-house or send to a lab of your choosing. You will be prompted to select the desired implant site(s) and load the initial records (figure 2A). Next, you can choose to remove existing teeth (if you are planning for immediate placement) or design a virtual crown to facilitate a prosthetically driven treatment plan (figure 2B).
The prosthetic plan is derived from the patient’s actual occlusion as recorded by Trios or a lab scan of the patient’s stone casts. This case is shown using Trios, but any STL file can be used as the software has an open architecture. The extensive tooth library and design tools within the program will help you achieve a realistic prosthetic design in minimal time. You have the options of duplicating the contralateral tooth, creating a virtual wax-up, or making an occlusal adjustment with a virtual articulator right at the beginning of implant planning (figure 2C). This is in comparison to many programs that offer one library of generic teeth shapes that the clinician arbitrarily places without actual occlusal data to facilitate an ideal digital wax-up, or to traditional techniques that require a physical wax-up or the use of several different programs to get all the needed data into the implant plan.
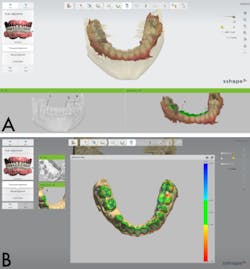
Next, the CBCT information is aligned with the intraoral scan using common points on the teeth, and the accuracy of the merge can be confirmed using a differential color map that shows how close the alignment is visually (figures 3A and 3B).
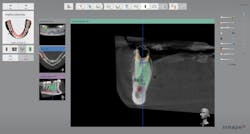
After the merge is confirmed, the implant(s) can be virtually placed based on the CBCT data and prosthetic design. There is an extensive library of all the major implant brands and guide tubes on the market, and there is no limitation on how many sites can be planned at one time. The program uses the prosthetic design to facilitate placement of each implant (figure 4). Then, a clinician or a lab tech can modify the implant position with the information from intraoral or cast scans, CBCT, and the prosthetic design.
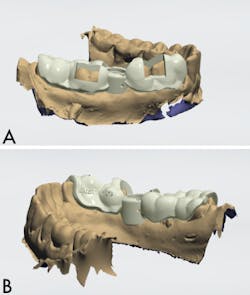
Finally, the guide is designed based on the Trios scan data. First choose the settings you want based on the manufacturing method of your choice, either 3-D printing or milling. In this case, we chose 3-D printing with the Form 2. All the settings have been tested and verified by 3Shape and Formlabs to ensure an ideal fit after the guide is manufactured. You can then design the guide to your preferences—full-arch, half-arch etc. Guide tube windows, glue ports, and directional indicators can be added as desired (figure 5A). An ID tag can be embossed on the surface of the guide for case-tracking purposes (figure 5B).
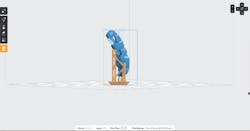
After the design is finalized, Implant Studio automatically orients and supports the guide. With intelligent recognition of guide tube and occlusal surfaces, the software automatically ensures that supports are not placed on these surfaces to ensure successful printing of the guide (figure 6). PreForm then pops up with the job fully prepared, and all you have to do is click “Print.” This saves a few minutes of manual job preparation and simplifies and streamlines the process. Postprocessing is accomplished per the manufacturer's instructions, and then the guide is ready for surgery.
Step No. 3: Surgical procedure
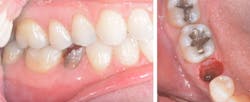
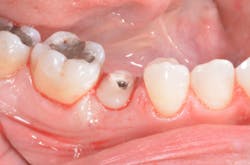
The patient took 2 g amoxicillin 45 minutes before the appointment, and a preoperative rinse with 0.12% chlorhexidine mouthwash was used prior to surgery. The patient was given right inferior alveolar nerve and long buccal nerve blocks, as well as No. 29 buccal and lingual infiltration with 2% lidocaine and 1:100,000 epinephrine. Next, No. 29's retained root was extracted with minimal trauma using a periotome (figure 7).
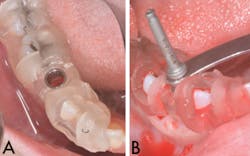
The surgical guide was placed, and a full seat was observed with good stability (figure 8A). The osteotomy site was prepared using serial drills per manufacturer’s recommendation (figure 8B).
Puros Demineralized Bone Matrix Putty (Zimmer Biomet) was used to fill in the gap between the implant and the socket and to repair the midbuccal fenestration (figure 9A). (3–4) A 4.7-mm x 11.5-mm Zimmer Trabecular Metal implant (Zimmer Biomet) was placed (figure 9B). The implant appeared to have good primary stability, ~45 Ncm.
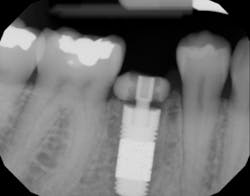
A custom healing abutment was fabricated using provisional abutment (Temp Abutment, Zimmer Biomet) and bisacryl resin (Integrity, Dentsply Sirona). The healing abutment was placed and tightened by hand (figure 10). Postoperatively, a periapical radiograph was taken demonstrating good prosthetic positioning, and no damage to adjacent anatomic structures (figure 11).
How does it compare to other products?
There are many options for implant-planning software on the market today, which makes picking one difficult. To help with this choice, we have attempted to list some of the pros and cons of the 3Shape Implant Studio to try to help you make an informed decision.
Pros
• Time-efficient workflow
• Open software incorporating a large library of implants and guide tubes
• Verified settings for ideal fit
• Customized drilling protocol printout
• Quality of the graphics interface
• Integrated prosthetics based off the Trios scan and existing dentition/occlusion
• Great support team
• User-friendly and self-contained workflow using only one program
• Easy communication with labs through the 3Shape Communicate Portal
• Systematic workflow that helps reduce user error and promotes a prosthetic treatment plan
Cons
• Manipulating the CBCT data in the program is not as intuitive as other programs
• Cost for acquiring and maintaining the Trios and the Implant Studio
• Lacking protocol for heavily restored cases
• More options needed in the abutment library
The most beneficial feature of the 3Shape Implant Studio workflow is the prosthetically driven workflow. The plan features a realistic digital wax-up using an extensive tooth library and accurate occlusal data. Additionally, the workflow has been streamlined to reduce the time from initial records to surgical guide production while using critical checkpoints to ensure accuracy. Formlabs and 3Shape have worked together to bridge their software in a way that makes it easy for the user to take the guide from virtual design to printed product quickly with optimal results.
Editor's note: This article first appeared in Pearls for Your Practice: The Product Navigator.Click here to subscribe. Click here to submit a products article for consideration.
References
1. Whitley D, Bencharit S. Digital implantology with desktop 3-D printing. https://formlabs.com/digital-implantology. Formlabs white paper. Published 2015.
2. Whitley D, Eidson RS, Rudek I, Bencharit S. In-office fabrication of dental implant surgical guides using desktop stereolithographic printing and implant treatment planning software: A clinical report. J Prosthet Dent. In press.
3. Bencharit S, Byrd WC, Hosseini B. Immediate placement of a porous-tantalum, trabecular metal-enhanced titanium dental implant with demineralized bone matrix into a socket with deficient buccal bone: a clinical report. J Prosthet Dent. 2015;113(4):262-269.
4. Bencharit S, Allen RK, Whitley D. Utilization of Demineralized Bone Matrix to Restore Missing Buccal Bone During Single Implant Placement: Clinical Report. J Oral Implantol. 2016;42(6):490-497.
