Predictable esthetics using smile design and a balanced occlusion in centric relation
Before I understood the concept of complete care and principles of occlusal stability, outcomes for my larger cases (10 or more units) were subpar at best. I wasn’t able to provide the type of dentistry that I wanted to offer—long-term, stable, and beautiful results. This left me feeling stressed, frustrated, and lacking confidence.
With the aim of improving my outcomes and overall dentistry, I decided to further my education. I attended The Dawson Academy to learn more about comprehensive care and smile design. Learning their philosophy has helped me enjoy dentistry again, as it’s led to a steady increase in case acceptance and predictable results in esthetic cases. The following case is an example of how my approach to smile design has changed.
Case study
Smile design
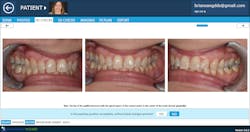
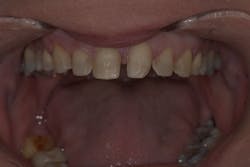
A patient came into my office with a simple request: “I want a pretty smile.” As with every new patient, I conducted a thorough new patient exam using The Dawson Diagnostic Wizard (figures 1 and 2).
Figures 1 and 2: Patient presentation and exam summary
During a complete exam, we look at many different elements, including but not limited to the following:
- Airway issues
- Temporomandibular joint (TMJ) stability
- Head and neck pathology
- Muscles
- Occlusal analysis
- Periodontal assessment
- Two-dimensional esthetic smile analysis
After the complete exam, we reviewed our findings with the patient and found that her chief complaints were closing the space between her teeth, leveling out her teeth, and lightening her smile (figure 3).
Figure 3: 2-D checklist
A facebow was taken using the Denar Slidematic Facebow, then a centric-relation bite registration was taken using rigid wax and a Lucia Jig along with bimanual manipulation. We then used the facebow-mounted models with a centric bite, a diagnostic three-dimensional wax-up, and equilibration to achieve the five requirements for occlusal stability:
- Stable contacts on all teeth of equal intensity in centric relation
- Anterior guidance in harmony with the envelope of function
- Disclusion of all posterior teeth during mandibular protrusive movement
- Disclusion of posterior teeth on the non-working side during mandibular lateral movement
- Disclusion of posterior teeth on the working side during mandibular lateral movement
In this case, being minimally invasive and providing restorative longevity was of the utmost importance and was a key goal in our treatment plan for this patient.
Presenting the treatment plan
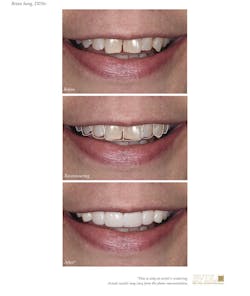
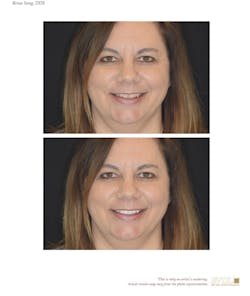
We worked with Bay View Dental Lab to create a digital before-and-after view of the patient’s proposed new smile (figures 4 and 5). We presented treatment options to the patient to achieve her new smile.
Figures 4 and 5: Case presentation
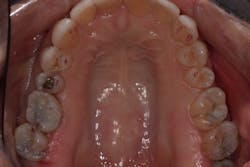
Ultimately, the patient decided to proceed with a treatment plan that consisted of a combination of veneer preparations and 3/4 crowns on teeth Nos. 5–12, small incisofacial composite preparations on teeth Nos. 24, 25, and 22 to create equal-intensity centric stops, posterior amalgam replacement, and an equilibration.
Preparing the new smile
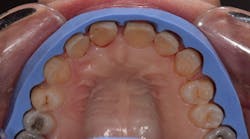
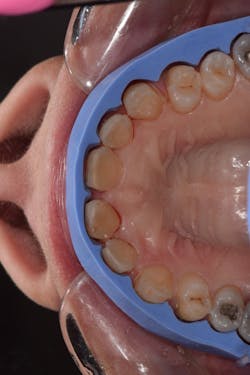
Our first appointment focused on the equilibration of both arches and preparation of the maxillary teeth using a combination of silicone and plastic preparation reduction guides (figure 6).
Figure 6: Silicone and plastic preparation reduction guides
A composite veneer was used on tooth No. 22 to achieve contact with the opposing arch. Using a quarter-round bur, we completed minimal incisal preparation on teeth Nos. 24 and 25 in order to place Estelite quick composite (Tokuyama Dental) to cover exposed dentin.
Three-quarter crown preparations were also used on the central incisors, followed by veneer preparations on teeth Nos. 5–7 and 10–12 (figure 7).
Figure 7: Preparation
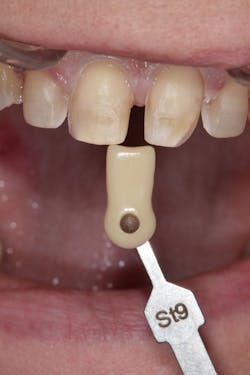
A conventional crown preparation was completed on No. 31. Sil-Trax (Pascal Company) was packed and the final impressions taken. A stump shade photograph was also taken to better communicate shading with the lab (figure 8).
Figure 8: Stump shade
Custom-made prototypes were fabricated (Voco), and our patient was instructed to wear her new smile for a week to evaluate the new incisal position. This ensured that esthetic, functional, and phonetic harmony was achieved.
Figure 9: Prototypes
Once final equilibration was completed and the patient was happy with her new smile, a new facebow and final impressions of the prototypes were taken to communicate the exact incisal edge position and contours to the lab. A new bite of the approved interocclusal relationship was also taken in Futar (Kettenbach) and used to cross-mount the models at the lab with a bite of the maxillary preps to the opposing dentition.
Creating a new smile
The prototypes were removed at the insertion appointment, and the e.max veneers (Ivoclar Vivadent) were tried in for the patient to approve. We used neutral Variolink Esthetic (Ivoclar Vivadent) try-in cement on veneers Nos. 5–8 and warm try-in cement on Nos. 9-12 to evaluate the final chroma of the restorations.
Isolation of the preparations was achieved, followed by acid etching of the enamel surface using Etch-Rite (Pulpdent). Monobond Plus (Ivoclar Vivadent) was applied and thinned by continually removing the bonding agent with the quick tip and drying the tip with a clean cotton 2x2.
This technique guarantees no water or oil contamination, or pooling of the adhesive. Warm Variolink Esthetic dual-cure cement was used to place the veneers and tac cured for two seconds, followed by the removal of excess with a No. 15 blade. The crown on tooth No. 30 was cemented using Ceramir cement. During this appointment, the posterior amalgam restorations were also removed and replaced with Estilite Omega (Tokuyama Dental) composite.
Finally, the occlusion was balanced using fine diamonds and polished using a combination of composite and porcelain polishing kits.
Figure 10: Completed treatment
Conclusion and results
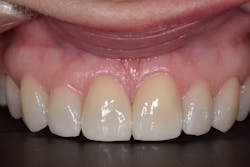
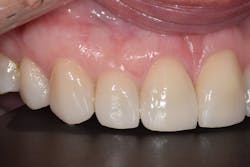
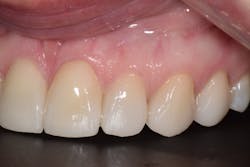
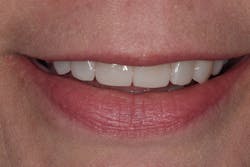
The final smile design can be seen in Figures 11–14.
Figures 11–14: Completed smile design
All five objectives of occlusal stability were achieved along with the patient’s cosmetic desires.
Using before-and-after mock-ups is a great means to communicate with your patient and illustrate the ability of the artistic work that can be achieved. However, a balanced occlusion must not be overlooked and is imperative for a long-lasting, healthy masticatory system.
Editor's note: This article first appeared in Breakthrough Clinical, the clinical specialties newsletter of DentistryIQ and Dental Economics.
