Secrets to successful dental dam placement
By Mary R. Costello, CDA, BS
Editor's Note: This is the first part of a two-part series by Mary Costello, leader of the nationally known Dam-It! It's EasySM Educational Programs. This article covers basic concepts, while an article in a future issue of DE&M will tackle advanced concepts.
Although so widely advocated by leading professionals, many practicing dentists choose to ignore the dental dam. The reason? Many dental professionals believe that dam placement is too time-consuming to be of value. This misconception can be easily overcome by employing simplified dental dam techniques that expedite its placement.
Implementing dental dam into your practice of dentistry is easier than you think if you follow these basic rules:
Streamline your dental dam armentarium
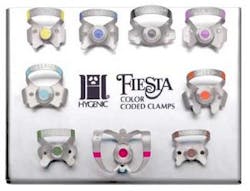
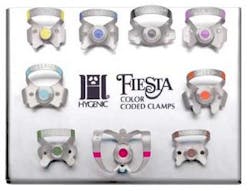
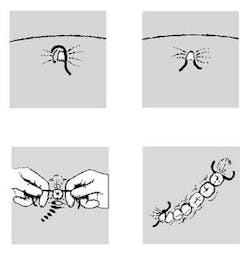
Your dental dam set-up should contain dental dam forceps, punch, and frame. Keep your clamp selection limited to just a few basic clamps. This will not only eliminate confusion, but will also reduce your inventory. An organizational system like the Fiesta® 9 Clamp Pak (seen at right), makes it easy to select and identify the appropriate clamp for a specific procedure. The matte-finished clamps are color-coded for easy identification and are stored on a stainless steel organizer that may be sterilized. An alternative to clamps is Wedjets®, Dental Dam Stabilizing Cord (seen at right). Wedjets Cord is a strip of natural rubber latex that — when stretched between the contacts — will retain the dental dam without using a clamp. Wedjets Cord is available in three sizes and may be used in almost every situation where there is a distal contact. They are more comfortable to the patient, easy to use, and are disposable. Using Wedjets Cord is easy. Simply stretch the cord into the distal contact at each end of the isolation. Placing the dental dam on the frame prior to its placement in the mouth will expedite the application process.
null
null
null
null
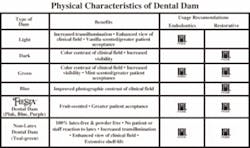
Dental dam is available in a variety of colors and gauges. The darker shades provide contrast to the operating field, while the lighter colors reflect light onto the field. Heavier gauges provide greater gingival retraction and are intended for use during restorative procedures. Thinner gauges are recommended for isolation during endodontic therapy (seen at right). A non-latex dental dam is also available for those individuals who are allergic to natural rubber latex.
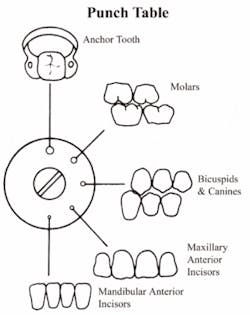
When preparing the dental dam, it is imperative to use a sharp dental dam punch. A dull punch will cause a nick or tag in the dental dam, which will cause the dam to tear as it is being placed. It is also important to punch the appropriate hole for the tooth or teeth selected for isolation (see chart at right). This will ensure proper inversion of the dental dam around the necks of the teeth.
Use simplified dental dam techniques
The Winged Technique: This technique is the easiest and may be applied very rapidly.
null
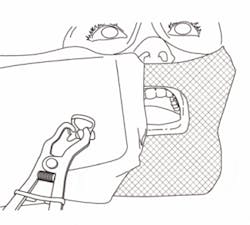
First, the dental dam is placed on the frame so that the top of the dam is even with the top of the frame. Holes are punched in the middle-third of the dam to correspond to the quadrant being isolated. A winged clamp is placed into the dam, and the entire "unit" is carried to the mouth in one step (seen at right). Once the clamp is seated, the dental dam is stretched off the wings of the clamp.
null
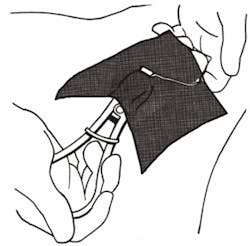
The Modified Winged Technique: This technique allows the clinician to apply the dam using a wingless clamp without the frustration of stretching the dam over the clamp while it is seated in the patient's mouth. The wingless clamp is positioned into the dam first by stretching the bow of the clamp through the dam prior to placement in the patient's mouth (seen at right). Both the clamp and dam are carried to the mouth. The clamp is seated and the dam is stretched over the jaws of the clamp. The frame is then applied.
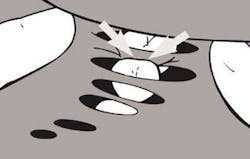
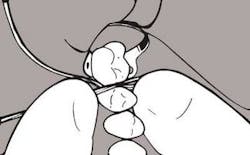
Managing the Interseptal Dam: To facilitate placement of the interproximal dental dam, it is imperative to use a water-soluble lubricant (KY®-Jelly,) on the tissue (glossy) side of the dam. Rather than bunching the interseptal dam and forcing it between the contacts, guide an edge of the dam into the contact area first, and then pull the remaining dam through the contact (Figure #1). If the contacts are tight, waxed dental floss may be used to negotiate the interseptal dam into place. This is accomplished by using waxed dental floss to carry an edge of the dental dam through the contact first. Next, the lingual end of the floss is looped over and inserted into the contact while carrying more dam with it (Figure #2).
Train your staff to apply dental dam
The most successful practices know how to maximize their time by delegating specific functions to dental auxiliaries. Dental dam placement and removal is such a function that may be easily delegated to auxiliaries who have received appropriate training.
null
null
Finally, incorporating dental dam into your practice of dentistry is easy. Use the simplified techniques discussed earlier, such as the winged or modified winged techniques. Staff properly trained to apply dental dam will not only increase your productivity, but will provide you with a contaminate-free environment in which to practice dentistry.
null
Hands-on programs for dental dam placement are available through Coltene/Whaledent, Inc. In addition, a self-instructional program is also available. All programs have been approved for CDE credits. For more information on the Dam-It, It's Easy!SM Educational Programs, or products featured in this article, please call (800) 221-3046, Ext. 8198.
Mary Costello, CDA, has more than 30 years of experience in the dental field, serving as expanded duties dental auxiliary for the U.S. Army, a dental coordinator for a hospital-based dental center, and a dental dam instructor, lecturing throughout the U.S. and Canada. Costello is currently continuing education manager and professional relations-Hygenic products for Coltene/Whaledent, Inc. To schedule a seminar for your staff or organization, contact Costello at (330) 492-8585, or send an e-mail to [email protected].
