How to make Great Impressions
By Eli Mastour, DDS; Photos by Ingrid Skarstad
In my dental school days, my mentor used to constantly remind me that the most important step of our crown and bridge work is the step we are on, at that particular point. Over the years, one of the most challenging and time consuming procedures has been that on impression making.
It is very selfish of us as dentists to expect the best from our lab technicians if our impression is one not mimicking the preparation as well as its surrounding tissue. Moreover, it is absolutely imperative of us to ask for best fitting and looking indirect prosthesis if we take the proper steps in making a good, well defined impression.
A good preparation with well defined margins, proper occlusal reduction, proper taper and subsequent lack of undercuts are all factors to be evaluated prior to the impression making. Once the above criteria is met, however, it is then where we will shift our focus on replication of the preparation into our impression.
Access to the tissue around gingival portion of the preparation is the start. Nowadays, we have more than just the classical cord packing technique for tissue displacement. Products such as expasyl (kerr dental), astringent and viscostat (ultradent inc.)and instruments such as lasers and electrosurgery devises have a great place in our practice. They aid in tissue retraction and moisture control. A more classical approach is the double technique cord packing. It also happened to be the technique I personally prefer. It has been my experience that the double cord technique is very predictable. It helps in elimination of fluids such as blood and saliva in and around the periodontal sulcus as the impression material is flown around and beyond the margin.
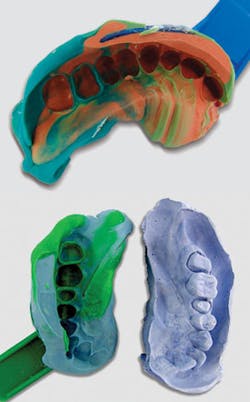
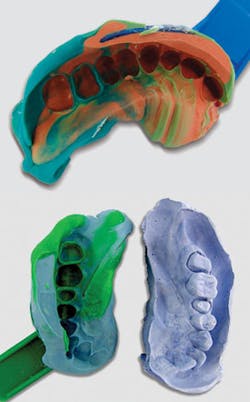
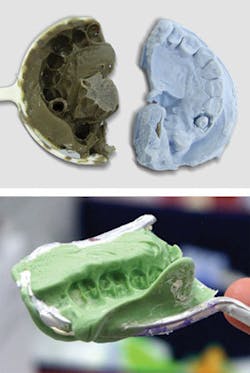
First cord, usually a 0’ or a 00’ is used. The cord is cut to a length equal to the circumference of the tooth. It is important to impede the cord in its entirety below the gum line. Once the first cord is placed, the clinician should be able to inspect the tooth and not be able to see the cord as it should be completely submerged to the bottom of the sulcus. This cord acts in elimination of fluid seeping of the sulculr fluid onto and around the margin. The second cord (a 1, 2 or 3), depending on the thickness and depth of the sulcus, will be cut to a length equal to approximately 1.5 times of the circumference of the prepped tooth. This cord is to be placed in a hemostatic agent and left in the solution for at least five minutes to allow the cord to soak in the hemostatic medium. The cord is then packed in a back-pack motion. With proper pressure on the cord packer, the cord should be retracting the tissue while eliminating any hemorrhage. Once the cord is packed, it should be seen sticking out of the sulcus mininmaly. If the cord is not visible in any area upon inspection, a small piece should be added in that area to ensure proper displacement of the tissue. In 7-10 minutes, the cord has displaced the tissue. At this point, the cord should be washed with a gentle stream of air/water. This will ensure a moist cord prior to its removal from sulcus. This will eliminate any tears of tissue as the cord is separated from the tissue. It will further wash away the hemostatic agent that is residing on and around the margin. Once the cord is removed, we should be able to visually see the margin all around. It is a good rule to remember that if a margin is not clearly visible, impression material will have a hard time flowing into that area. Once the margin is inspected circumferentially, light body is injected very slowly not to introduce any air bubbles. The impression tray should by now be filled by the assistant with heavy body. If a triple bite is taken, the patient should be asked to bite down first without any material. This will ensure proper closure into maximum intercuspation. If a custom tray is used, the clinician should ask the patient to stay open, the tray is seated very carefully and it is held in place until it sets. Please remember that the first cord (0 or 00) was left inside the sulcus while the impression is made. Once the impression is made, you can leave the cord in the sulcus until the provisional is fabricated and cemented. At that point, the excess cement and the cord could be removed and the patient dismissed.
Biographical Sketch
Dr. Pedram Eli Mastour maintains a private practice in Culver City, Calif., with an emphasis on esthetic and reconstructive dentistry. A member of the American Dental Association and California Dental Association, he also is a clinical instructor at the University of Southern California School of Dentistry, primary oral health care section. Dr. Mastour may be reached at (310) 390-6212, or e-mail [email protected].


