Digital or analog: The concept of complete dentistry is the same
OVER THE LAST 10 YEARS, I have gained a lot of experience in digital dentistry by using many of the popular intraoral scanners, mills, and 3-D printers. Previously I had only utilized digital workflows for single posterior indirect restorations, clear aligners, surgical guides, and occlusal splints. For some reason, I had remained analog for my esthetic, occlusal, and complex reconstruction cases. Once one has developed confidence in a workflow that produces predictable results, it can be difficult to step outside that comfort zone to try something new. So, to nudge myself from being too comfortable, I decided I needed to complete a more comprehensive case that employed both digital and analog workflows.
Patient history and comprehensive exam
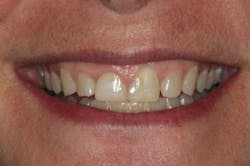
A 42-year-old female presented with sensitivity of her maxillary anterior teeth, and she was unhappy with the appearance of her smile. The patient didn’t like the overall shade of her dentition or the shape, size, and contours of her maxillary anterior teeth. She reported a recurrent history of chipping of the maxillary incisal edges, as well as multiple attempts to repair those edges with composite. In addition, there was a previous history of a diastema between Nos. 8 and 9 that was closed with composite. The patient’s prior dentist had informed her that her front teeth were starting to get “thin” and said they had been “watching it” for years. As the esthetics of her smile began to deteriorate and sensitivity started to increase, the patient decided it was time to stop “watching it” and start treating it.
Beyond esthetics, the new-patient interview revealed headaches five to 10 times a month, usually in the mornings. The patient also reported occasional jaw pain or stiffness. Examination of the muscles revealed that the masseters and medial pterygoid muscles were tender to palpation bilaterally. The joints were evaluated with Doppler auscultation and tested negative for any clicking or crepitus both in rotation and translation. The joints were also load tested using bimanual manipulation, and it was determined that both joints could comfortably accept a full load. From the initial exam, it was clear that the patient had both esthetic and occlusal needs, so she returned for full diagnostic photos and records.
Seeing the signs
Any successful treatment starts with full diagnostic records regardless of the type of workflow—digital or analog. These records include a comprehensive exam, patient interview, full photography series, facebow, and models mounted in centric relation on a semiadjustable articulator. With full diagnostic records, we evaluate how we can achieve occlusal stability while providing the esthetic results the patient desires.
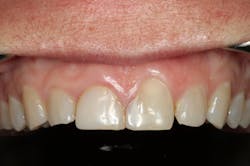
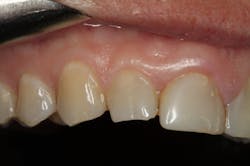
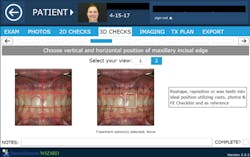
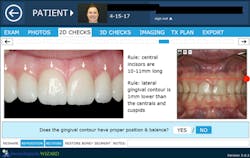
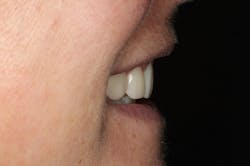
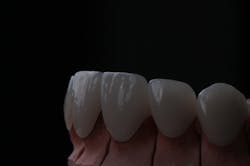
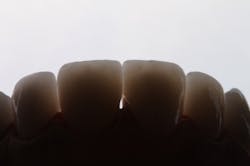
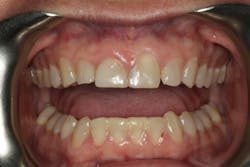
We digitally analyze our esthetics and smile design using the Dawson Diagnostic Wizard (the Dawson Academy). One of our biggest esthetic concerns in this case was caused by a functional issue. As you can see in the photos (figures 1 and 2), the patient has significantly more attritional wear on the right side versus the left. Due to the wear, the right anterior teeth have suffered from more compensatory eruption than the left, which results in uneven gingival architecture and esthetically displeasing length-to-width ratios of the anterior teeth (figures 3 and 4).
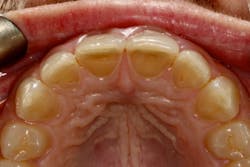
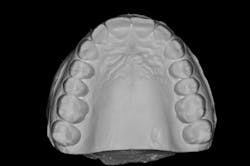
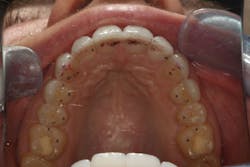
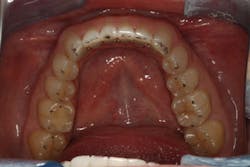
When we start to look at our occlusal shots (figures 5 and 6), it is obvious that we have some acidic erosion into dentin as well as significant wear facets from attrition. The pulp chambers of teeth Nos. 8 and 9 are now visible due to the loss of lingual tooth structure.
3-D treatment planning
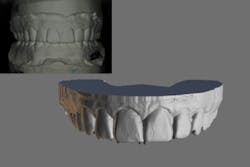
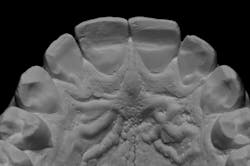
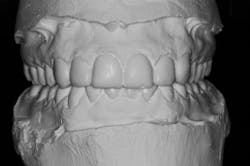
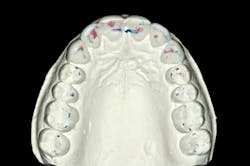
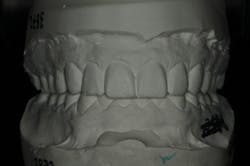
We always complete treatment on our models before we ever begin treatment on our patients, so that we are confident we can achieve the same result in the mouth. Below you will see that we completed a minimal wax-up to recontour the gingival levels and correct proportions and contours. We also worked out Dawson’s 5 requirements of occlusal stability by utilizing equilibration and refining the anterior guidance with our proposed restorations.
Dawson’s 5 requirements of occlusal stability:
1. Stable, equal intensity contact on all teeth in centric relation
2. Anterior guidance in harmony with the envelope of function
3. Disclusion of all posterior teeth in protrusive movements
4. Disclusion of all posterior teeth on the working side in lateral excursive movements
5. Disclusion of all posterior teeth on the nonworking side in lateral excursive movements.
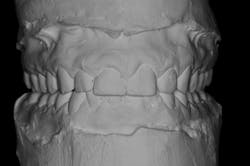
These models (figures 7–10) can then be sent to the laboratory for fabrication of the final wax-up, reduction guides, and provisional matrices. In contrast, we could also scan these models and upload the files to perfect our digital wax-up.
The approved treatment plan
After discussing our findings with the patient, we formulated our initial treatment plan:
1. orthodontics utilizing clear aligners
2. surgical crown lengthening Nos. 6–11 to correct the soft-tissue architecture
3. equilibration to refine occlusion
4. in-office whitening followed by porcelain restorations on Nos. 5–12 (minimal preparation veneers on Nos. 5, 6, 11, and 12; full-coverage crowns on Nos. 7–10)
Phase 1: Orthodontics
The patient was adamant that she did not want traditional orthodontics, so she elected to proceed with clear aligner therapy. The goal was to minimize or eliminate any preparation on the lingual surfaces of teeth Nos. 7–10 to prevent possible pulpitis. To accomplish this we needed to move the maxillary incisal edges facially 0.5–1 mm and perform interproximal reduction of the mandibular anterior teeth to retract Nos. 22–27 lingually approximately 1 mm. Some minor orthodontic movement also allows us to be more conservative with the equilibration.
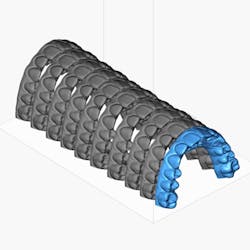
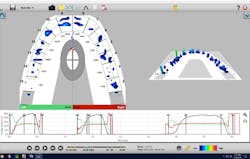
We uploaded our intraoral scans into Blue Sky Bio software and planned the orthodontic movements (figure 11). The sequential models were then exported to our 3-D printer for in-office fabrication of the model and aligner. Treatment time was approximately nine months. Once orthodontic therapy was complete, we could then remount our models to reevaluate occlusion and refine the treatment plan as needed.
Phase 2: Crown lengthening
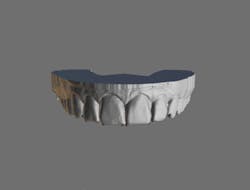
After orthodontic therapy was complete, new models were mounted and sent to the lab for a diagnostic wax-up (figure 12). While the stone models were at the lab, we uploaded digital scans into Meshmixer software and completed a digital diagnostic wax-up (figure 13). I used matrices fabricated off of the analog and digital wax-ups to compare fit and accuracy.
A traditional surgical stent was fabricated using the lab-fabricated diagnostic wax-up (figure 14). The stent can also be easily designed digitally and printed if desired. The patient was then referred to the periodontist for crown lengthening to correct the soft-tissue contours.
Phase 3: Equilibration and provisional restorations
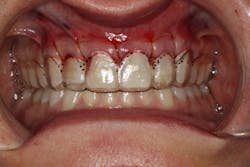
We allowed the soft tissue to heal for four months following crown-lengthening surgery. We then refined our occlusion utilizing reductive equilibration. Following equilibration, we prepared teeth Nos. 5–12 and placed the patient in temporary restorations (figures 15 and 16). We use the temporary restorations to evaluate esthetics, phonetics, and function to ensure that the restorations are placed in functional harmony. Any refinements are completed in the provisional restorations, so the laboratory can use those as the blueprint for the final restorations.
Phase 4: Final restorations
Once we have confirmed esthetics, phonetics, and occlusion in the provisional restorations, we then take impressions (or scans) and photos of the provisionals to send to the lab as a guide for the definitive porcelain restorations.
Using photography to evaluate esthetics
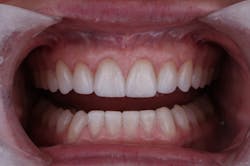
For a variety of reasons, I always take photographs of the porcelain restorations once they arrive in the office (figures 17 and 18). First, this forces me to evaluate the final product when the case has arrived so that if there are any revisions, I still have time to send the restorations back to the lab before the patient’s appointment. Second, I can also create a “catalog” of restorations that I have delivered, which allows me to communicate better with my laboratory. In the future, I can send these photos that exhibit the characteristics I like to the laboratory to mimic. For example, I may send a particular photo to the lab and request that the type of texture or translucency shown in the photo be duplicated.
The focus needs to stay on function
It is important to remember that esthetics is only one aspect to consider when treatment planning. It doesn’t matter how beautiful the restorations are if they do not achieve long-term functional success. In the images below, you will see Dawson’s 5 requirements of occlusal stability illustrated (figures 19–21):
Final thoughts
In comprehensive dentistry, it is often said that we complete a case four times:
1. in our minds (treatment planning),
2. in wax (diagnostic wax-up),
3. in plastic (provisional restorations), and
4. in porcelain (final restorations).
While the workflow is starting to change, the principles remain the same to achieve long-term, predictable results. Now, instead of completing a case in our minds, we're working it out on a computer. Instead of completing the case in wax, we now use 3-D printed models in resin. Today, instead of directly fabricated bis-acryl provisional restorations using a putty matrix, we can 3-D print or mill provisional shells prior to even preparing the case. Ultimately, it is all about obtaining an excellent end result. It doesn't matter whether you use a digital or analog workflow; it's about what works best in your practice.
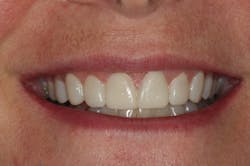
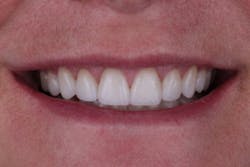
In this situation, we were able to achieve all of our functional and esthetics goals, which resulted in a happy patient (figures 22 and 23). The soft-tissue architecture was revised. The incisal edge positions and proportions were corrected. The shade, as well as the micro- and macro-esthetics, was improved. The exposed dentin and pulps of teeth Nos. 7–10 were covered and protected. Most importantly, we fulfilled the 5 requirements of occlusal stability for long-term functional success (figures 24 and 25).
Read more clinical dentistry articles at this link.
Editor's note: This article originally appeared in Breakthrough Clinical, a clinical specialties newsletter from Dental Economics and DentistryIQ.
