The immediate implant crown
By Douglas W. Voiers, DDS, FWCM, FAGD, FICOI
Placement of a single-unit, implant-abutment immediately followed by a full-coverage crown is now possible using two advanced dental technologies. The immediate ISI implant (O Company, Albuquerque, N.M.) has been developed with an integrated abutment. Merging this technology with the CEREC (Sirona, Charlotte, N.C.) CAD/CAM restorative system has resulted in the potential for a wonderful new service for our patients.
Case report
An elderly woman who had been wearing an uncomfortable flipper for missing Tooth No. 6 requested an implant option. She rejected the fixed-bridge option since it involved treating the adjacent teeth. She also rejected the traditional three-stage implant process that takes four to six months to complete a single-tooth case. When I explained the risks and benefits of an untested, new procedure that could provide her with an immediate one-visit replacement for her flipper, she was excited about the possibilities. Long-term expectations of this case were discussed and the case was accepted.
Photographs
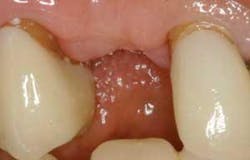
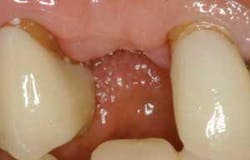
Figure 1 - Preop facial view. Adequate soft tissue was present to provide papilla formation, provided the implant crown emergence profile was properly formed.
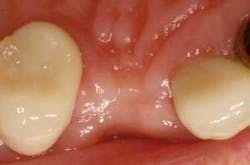
Figure 2 - Preop occlusal view. Adequate bone width did not necessitate ridge augmentation.
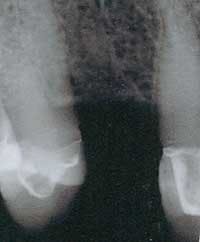
Figure 3 - Preop radiograph. Excellent bone present.
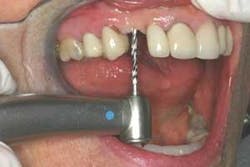
Figure 4 - Pilot drill for implant placement. A laser was used to create the soft tissue access for the pilot hole. The 1.8 mm diameter pilot drill was followed by the 2.5 mm diameter drill to depth, followed by the 3.0 mm drilled just short of final depth.
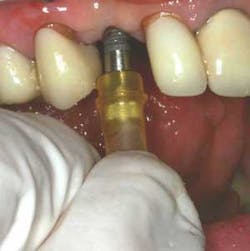
Figure 5 - Implant-abutment unit. The ISI implant-abutment unit is placed initially using fingers, followed by the Thumb Nob, then the wratchet. The depth was determined by both bone resistance as well as determination of margin height just below the soft-tissue margin.
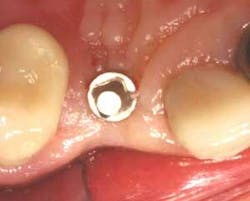
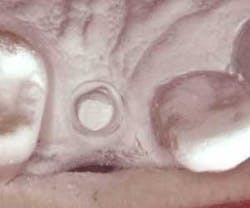
Figure 6 - Implant-abutment unit occlusal view. Occlusal view of the ISI implant-abutment unit.
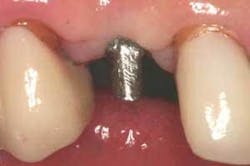
Figure 7 - Abutment prepared to tissue height. The abutment is prepared using a medium grit diamond to provide a course surface, which enhances micromechanical lock to the cement.
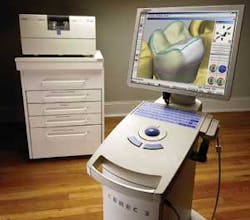
Figure 8 - CEREC 3D unit.
Figure 9 - Titanium dioxide powder for CEREC image. The prepared abutment is sprayed with a titanium dioxide powder, creating a highly reflective surface which facilitates accurate imaging from the CEREC infrared camera.
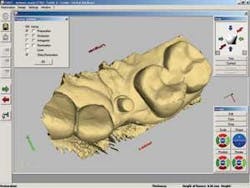
Figure 10 - Virtual model generated from multiple CEREC images. After the images are taken with the CEREC camera, the software program generates a virtual 3D model of the area.
Figure 11 - CEREC crown proposal in Edit mode. The crown design proposal is edited.
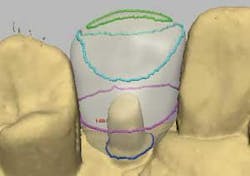
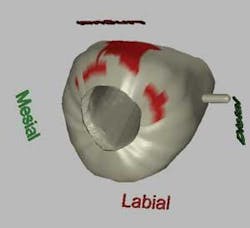
Figure 12 - Crown designed with overcontoured emergence profile. A view from the underside of the crown demonstrates how the emergence profile is enhanced in order to provide adequate soft-tissue relationship to the crown.
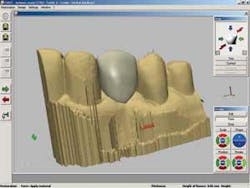
Figure 13 - Final crown CAD/CAM design. The crown design is completed and placed on the virtual die, ready to be milled.
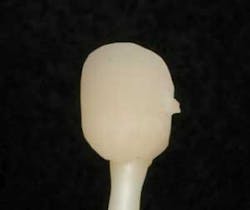
Figure 14 - Milled, unpolished crown, facial view on stick. The completed, milled crown is taken from the milling chamber and placed on a stick to view. Note the sprue still in place.
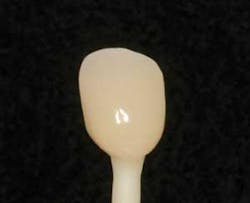
Figure 15 - Polished, completed crown on stick. The milled crown is tried in, and occlusion and contacts are adjusted properly. Then the crown is polished to a high shine. Note the three levels of saturation contained within the Vita TriLuxe block material.
Figure 16 - Try-in disclusion. The crown is tried in; contacts are adjusted so the crown is just out of centric occlusion and avoids contact in any lateral excursive movements.
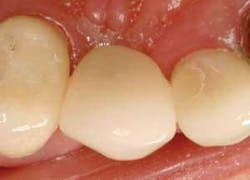
Figure 17 - Occlusal view of completed case. The occlusal view of the completed case shows broad, flat proximal contacts that facilitate proper esthetics and prevent proximal food and plaque entrapment.
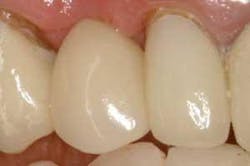
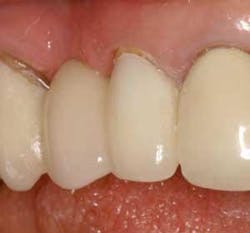
Figure 18 - Oblique view of the completed case. Completed crown from facial view using the 1M2C Triluxe ceramic block material (Vita). Yellow MultiLink cement (Ivoclar Vivadent) was used to bond the crown to the metal abutment.
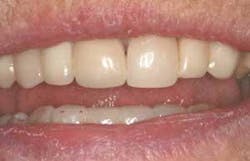
Figure 19 - Full-smile view of completed case. The patient is extremely pleased with the final functional and esthetic result.
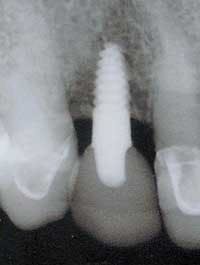
Figure 20 - Postop X-ray of immediate implant-abutment-crown. Immediate X-ray shows implant placement centered between the adjacent teeth.
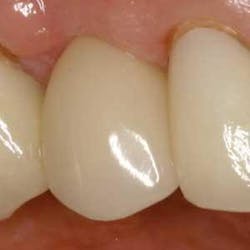
Figure 21 - Three-week postop view, facial closeup. Note the papilla development and soft-tissue architecture at three weeks postop. The implant-abutment-crown unit has integrated nicely.
Conclusion
General dentists can now begin to consider combining several advanced technologies to provide an implant-abutment-crown in a single visit. This technique has the potential to provide an amazing service to patients by avoiding the arduous four-to-six month standard implant-restoration process.
Although only three-week postop results have been documented, already the technique holds promise. Papilla formation has occurred and the implant-crown unit is stable and healthy so far. The patient is taking more personal pride in her restoration and in her appearance, as evidenced by a dramatic improvement in plaque removal and overall oral hygiene observed at her three-week checkup.
Despite the less-than-ideal situation, the case appears to be doing well to date. We have learned that a highly esthetic result can be achieved in replacing a missing tooth in only one visit. The long-term viability and predictability of such a procedure is yet to be determined. One alternative may be to use a Paradigm MZ100 crown instead of ceramic initially. The dentist could cement it with temporary cement and leave it in place for a period of three to six months while osseointegration takes place. Since the initial crown design can be saved in the CEREC computer, it can be fabricated later in ceramic and polished ahead of time. The patient can have a second visit at the four-to-six month point and have the temporary CEREC crown removed. The new crown can be adjusted slightly and the contacts repolished and bonded permanently in place. In this way, the patient is inconvenienced only by a second visit and its additional expense.
Dr. Douglas W. Voiers is a nationally recognized leader in high-tech cosmetic and restorative dentistry. Dr. Voiers has presented more than 100 lectures and courses on advanced dental procedures to doctors from around the country. His latest book, A Dentist’s Guide to CEREC, was released in 2003. He can be reached by e-mail at [email protected].
