Provide™ Restorative Technique
By Dave Anable, 3i Regenerative Product Manager
The increasing demands for surgical flexibility without sacrificing restorative simplicity have led to the development of the Provide Abutment. Traditionally, simplicity has been achieved by integrating the final crown margin into the implant design. When utilizing this implant design, the surgeon ultimately decides where the final crown margin will be at the time of surgery. By definition, this makes the placement of the final crown margin based upon surgical consequence, not restorative indication. Oftentimes, this is a difficult decision for the implant surgeon to make and the crown margin can potentially be placed supragingivally, compromising the esthetic outcome, or so far subgingivally that the removal of cement is difficult or not possible, compromising long-term tissue health. Because the Provide Abutment combined with the Certain Implant is a two-piece design, abutment selection is made after the tissue has fully healed and contoured. This means that the crown margin becomes a decision based upon clinical indication, not surgical consequence.
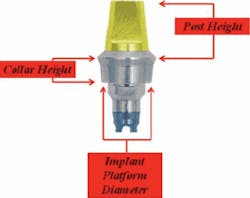
The Provide Abutment is available in four collar heights and two post heights for each diameter implant. Because the final crown margin is the top of the collar, the choice of collar height gives the clinician the ability to consistently place the final crown margin where appropriate in relation to gingival contours. Additionally, the clinician can choose from two post heights. Two post height options allow the clinician to have a maximum amount of post height and cement retention without impeding on the space needed for the porcelain and metal of the PFM crown.
Provide Abutments are color-coded to the implant restorative platform and to the abutment post height and diameter. Provide Abutments are also available packaged in kits so component selection is easily facilitated. With snap-on components, the need for an implant level impression is eliminated.
The following are step-by-step instructions for the successful use of the Provide Abutment.
Abutment selection
Provide Abutments are available for the 3i Certain Internal Connection Implant System. Please note that Provide Abutments do not come in the 3.4mm (MicroMini) platform. These are only available for the 4mm, 5mm, or 6mm diameter implants.
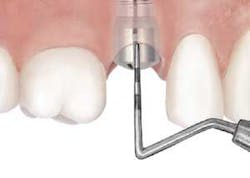
Step 1 - Measure the tissue depth to select the appropriate collar height. To determine the tissue depth, measure the exposed portion of the healing abutment to the top of the dome. Then, subtract the exposed amount from the overall height of the healing abutment to determine the distance from the implant restorative platform to the crest of the tissue.
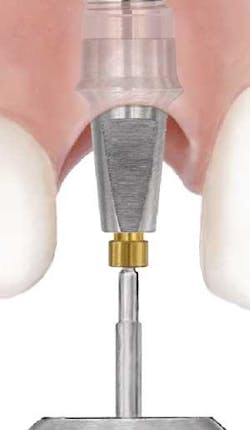
Step 2 - After determining the location of the collar height, measure the distance from that point to the opposing occlusion. This interarch space, minus 1.5 to 2mm for the PFM crown, will determine the proper post height.
The implant platform, collar height, and post height are all the information you need to select the appropriate abutment. For example, if the abutment is to be placed on a 4mm implant, the tissue depth is 3mm, and the interarch space is 6mm, the Provide Abutment would be an IPA4240 (4mm platform, 2mm collar, and 4mm post). This will place the crown margin 1mm subgingivally and leave 2mm space for the PFM crown.
Abutment placement
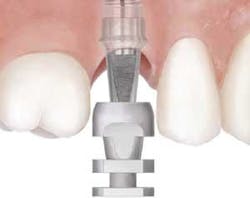
Remove the healing abutment to expose the implant restorative platform. Place the abutment into the implant with the flat side of the post facing buccally. Apply slight apical pressure until audible and/or tactile verification that the abutment is fully seated exists. It is recommended that the clinician take a radiograph to verify that the abutment is correctly seated. Torque the abutment screw to 20Ncm using a calibrated torque wrench.
Abutment preparation
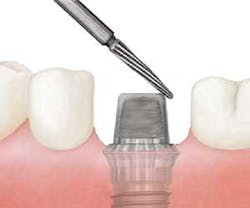
On occasion, the abutment will need to be prepared to account for needed interarch space or to draw on multiple unit cases. If the abutment should need to be prepped, use a carbide bur with copious irrigation, then continue on to the impression procedure.
Be sure to be careful not to prepare the margin of the abutment as the snap feature on the impression coping will not capture the prepared margin.
Impression procedure
There are two types of Impression Copings for the Provide Abutment.
Provide Impression Coping with Holes - for use with a prepared Provide Abutment.
Provide Impression Coping - for use with a nonprepared Provide Abutment.
Provide Impression Coping
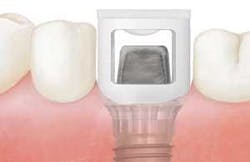
Step 1 - Place the Provide Impression Coping over the Provide Abutment. Make sure to line the flat side of the impression coping up with the flat side of the abutment. Snap the Provide Impression Coping over the margin area of the Provide Abutment.
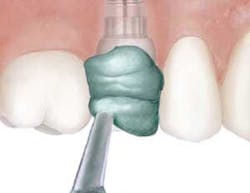
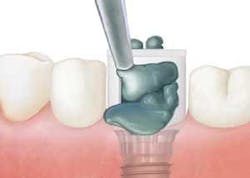
Step 2 - Syringe a medium- to heavy-based impression material around the Provide Impression Coping. Load a full arch impression tray and seat it into the mouth. Allow the impression material to set per the manufacturer’s instructions. Remove the impression tray. The Provide Impression Coping will be picked up in the impression.
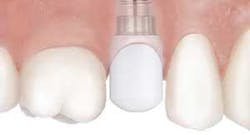
Step 3 - Place a Provide Protection Cap over the Provide Abutment and snap it over the margin area or fabricate a temporary crown and attach with temporary cement.
Provide Impression Coping with Holes
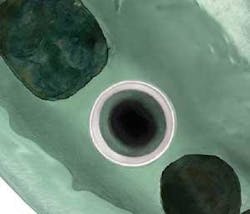
Step 1 - Seal the screw access hole with a temporary filling material and snap the Provide Impression Coping with Holes onto the margin of the Provide Abutment. You should feel the snap. Inject a medium body impression material around the Provide Abutment and into the large holes on both sides of the Impression Coping with Holes. Impression material should be seen extruding from the four small holes on top of the Impression Coping with Holes. Load a full arch impression tray with impression material and seat. Allow impression material to set per the manufacturer’s instruction.
Step 2 - Remove the impression. The Impression Coping with Holes will be picked up in the impression. Check for marginal integrity.
Step 3 - Fabricate a provisional crown and attach with temporary cement or utilize a Provide Protection Cap on the Provide Abutment and snap it over the margin area.
null
Crown Placement
Remove the Provide Protection Cap or provisional crown from the Provide Abutment using cotton pliers. Try the final crown onto the Provide Abutment Post. Check occlusion, marginal fit, and interproximal contacts. Cement the final crown onto the abutment.
Conclusion
When utilizing the Provide Abutment combined with the Certain Implant, you capture the best of both worlds. You gain the flexibility of abutment selection and margin placement with a two-piece abutment and implant design while capturing greater ease of use with snap-on impression components.


