Tips from the lab
By David French, Burbank Dental Laboratory
If you never get a phone call from a lab requesting additional information/records, or if you have never had a runaway case that cost you much more time than you estimated, then this article is not for you.
However, if you get the occasional phone call from the lab requesting additional information or records, then maybe you will find a pearl or two in this article.
Our daily routine at the lab involves getting and making calls regarding necessary records or regarding staging of more complex cases.
What does it take to be successful with larger more complex or demanding cases?
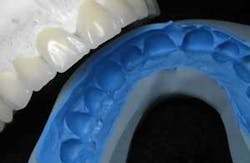
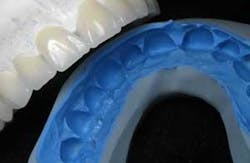
1. Don’t scrimp on records. What records do you need to provide to the lab and what is a good staging plan? See case sequencing later in the article for records you will want to collect.
2. Rx should be organized with bullet points, not a dialogue. Detail is important, but a two-page, hand-scribbled dialogue will not be used well by any lab.
Consider submitting a typed Rx with a maximum of 10 bullet points. Make sure it is clearly separated and organized.
State at the beginning what you want to receive - what materials, metal try-in or bisque bake, etc.
3. Accurately assess the number of appointments that a case could take, then use your worst-case scenario. I prefer the using the “Scotty Principle.” As Scotty in “Star Trek” always did, it is often better to predict the worst-case scenario, state the damage/problem in the worst possible terms, and tell that the “repair” will take a wee bit longer than the time in which you should be able to accomplish it. Don’t understate or cave in to patients when communicating the need for certain steps. Allow time for working out bugs with occlusion in provisionals or splints.
Many of the stresses of higher-need cases come from underestimating how much time - and therefore how much expense - a case will cost. This results in fees that are too low for the case, and patient expectations that are too skinny on the time commitment they might have to commit. If you are like most dentists, your tendency is to want to present the best-case scenario to patients in order to make it easier for them to digest the time and financial commitment. But, in higher-need or more complex cases, something always will require more time than in the ideal textbook world. We are dealing with living beings and they occasionally do not follow the textbook, right?
4. Give the lab enough time, whatever they say that is required. Call ahead during the appointment and go over desired procedures and due dates (always build in a couple extra days, for surprise situations).
Case sequencing
First appointment - record appointment (charge accordingly)
Stick bite, Face bow, photos (smile relaxed, large smile, retracted facial, profile smile relaxed and large, and with stick bite in place)
Measurements - CEJ to CEJ, C.O. Bite with soft bite registration material
Deprogrammed bite - Anterior NTI, Best Bite, Ball Bite “Deprogrammer,” or other deprogrammer (anterior open bite to relaxed “CR” bite Use LuxiBite on right and left posterior with anterior deprogrammer in place).
Lab procedures - Mounting models to centric occlusion and programming C.R. into articulator
Evaluation with clinician:
Equilibration treatments required
Tissue, tooth positioning, smile line, midline, symmetry, preparation style needed and teeth required to be restored and selection of restorative material and sequencing
Second appointment
Consult (discuss model and treatment required, composite mock-up)
Schedule case begin (records of mock-up, polyvinyl impressions, centric occlusion bite of mock-up)
Select shade shape overall smile design, clinical goals and patient goals
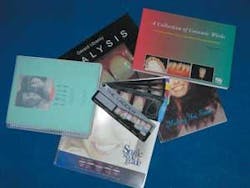
Which smile design for incisal edge design and tooth shapes? Using LVI Smile Guide, Discus Smile Catalog, or other of your choosing (make sure lab uses the one that you like).
Description or picture references of incisal edge and other characteristics. Best to use a ceramic photo book, The Ladder guide, or your own photos.
Lab procedures - between second and third appointment, lab waxes anterior 16-20 teeth (for example 4-13 and 20-30) to ideal esthetics, and CR and new VD if applicable. Note: Siltek of wax-up for temps made in mouth and one Siltek of wax-up to be cut back for prep guide.
Third appointment
Prep anteriors max and mandibular place temps
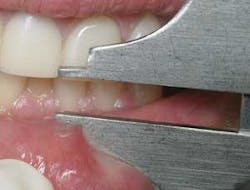
Capture new anterior bite with preps, using polyvinyl bite registration. Take bite with previous posterior hard bites from initial record appointment in place.
- Shade of prepped teeth
- Polyvinyl impression of provisionals
- Stick bite with provisionals seated
Photos of provisionals (smile relaxed, large smile, and retracted facial, profile smile relaxed and large, with stick bite in place)
Measurements - Between CEJ of lower to incisal edge of provisionals, length of both provisional centrals, and proportions desired. Note: Leave posteriors out of occlusion if this is a full-mouth restorative case.
Fourth appointment
Evaluation and adjust provisional for function and smile
When the patient is not numb and, after at least a few days, evaluate functions patterns, phonics, smile, patient acceptance. Verify shades and shapes selected. Models measurements if any shape changes are made. Very important note: Now give the OK to the lab to proceed to finish or make modifications
Anterior smile cases lab procedures - between third and fifth appointments, lab fabricates anterior 16-20 restorations, i.e. 4-13 and 20-30
Full-mouth restorative cases lab procedures - between third and fifth appointments, lab fabricates anterior 16-20 restorations, i.e. 4-13 and 20-30
Note: Lab processed provisionals for all posterior restorations
Fifth appointment
Anterior smile cases - seat all anterior restorations
Full-mouth restorative cases - seat anteriors, then prepare posteriors and seat temps
Lab procedures - between fifth and sixth appointments, lab fabricates remaining posterior restorations
Sixth appointment (one week after fifth)
Anterior smile cases - final adjustments and verify clean-up #2
Full-mouth restorative cases - seat posteriors verify over all functions
Seventh appointment (one week after sixth)
Full-mouth restorative cases - final adjustments and verify clean-up
Consider this as a guide, with human beings there is no 100 percent. But, if you spend more time taking records and working through potential problems in acrylic, you will have much better luck when you start seating ceramics.

David French comes from a dental family and as such has been exposed to issues in dentistry for many years and from diverse perspectives. Since 1975, he has been a dental technician. His initial training began as an in-house technician for Dr. Archie French in Arcadia, Calif. He came to Burbank Dental Laboratory in 1996. He may be reached by e-mail at [email protected].