Full lower-arch restoration utilizing immediate-loading implants: A case report
Prior to the introduction of implants, many patients who were missing numerous teeth were forced to endure the problems associated with removable dental appliances. Today, implant-retained restorations have become an integral part of dental treatment planning. The overwhelming success of this treatment has led to implant restorations being routinely utilized to successfully replace missing teeth.
Recently, it has been discovered that loading of dental implants immediately following placement is not only possible, but provides the same degree of success as waiting for integration to occur. Immediate loading of the implants provides a greater service to the patient as fewer appointments are needed to produce the prosthesis. By utilization of a provisional restoration, the restoring dentist is able to test the vertical dimension and occlusal relationships prior to construction of the final casting. This saves both time and money.
This article will detail how a fixed lower prosthesis is constructed utilizing immediate loading of nine Branemark implants.
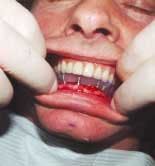
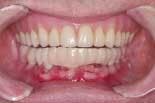
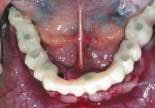
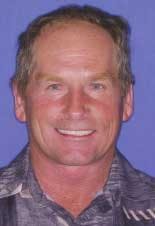
The patient is a 50-year-old male who is in good general health (figure 1). His chief complaint was the deterioration of his lower teeth (figure 2). He has been wearing a complete upper denture for about 20 years. His desire was to have fixed teeth in both the upper and lower arches.
Following extensive treatment discussions, it was decided to proceed with his treatment in two phases. The first phase would be the construction of a new CUD and removal of his lower teeth with immediate placement of nine implants. The implants would be immediately loaded and, following an integration period, the final lower restorations would be finished. Upon completion of the lower restorations, bilateral maxillary sinus lifts will be performed and upper implants placed to allow for full arch maxillary restoration.
The initial stage of treatment involves construction of a new upper denture. The denture is made to maximize esthetics and phonetics. A lower immediate denture is made at the appropriate vertical dimension and to tentative centric relation. Two duplicate dentures are made at the time of processing - one to serve as a provisional while the second is a clear matrix to serve as a surgical guide.
null
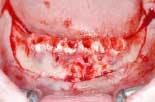
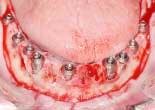
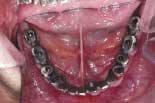
On the day of surgery, the remaining lower teeth are extracted (figure 3) and alveoplasty performed. Branemark Mk III TiU implants were placed in the 37, 36, 34, 44, 46, 47, and 31 sites. Branemark RS TiU implants were placed in the 43 and 33 sites. All implants were torqued to 45 Ncm. Multi-unit abutments were placed on the implants and torqued to 35 Ncm (figure 4). Bioss 1:1 autogenous grafting was done in the anterior region (figure 5) and the sites closed with chromic gut sutures. The maxillary CUD was inserted and the CLD was modified and relined with tissue conditioner.
Two weeks following the implant placement, the patient returned for conversion of the duplicate lower denture to a fixed provisional. We convert a duplicate denture to allow a safety net should problems be encountered during the conversion, as we can always go back to the overdenture.
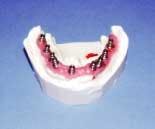
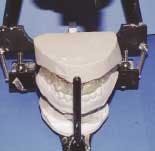
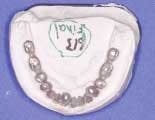
At the conversion appointment, a measurement of the vertical dimension is recorded. Marks on the nose and chin will serve as reference points (figure 6). The protective caps are removed from the abutments and closed tray impression copings are placed. A full arch polyether impression is made. Prior to removing the impression copings, a centric relation registration is made at the correct vertical dimension utilizing a soft polyvinyl bite registration (figure 7). The soft material is used to allow fit over the impression copings on the stone model. While this will not produce an extremely accurate bite registration, it is sufficient for this purpose. A model of the upper denture is made and a face-bow record taken. Following removal of the impression copings, a cast is produced that represents the implant placement and soft tissue (figure 8). The lower cast is articulated to the upper cast utilizing the bite registration (figure 9).
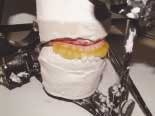
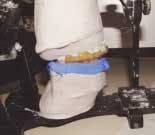
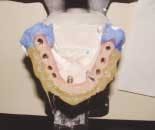
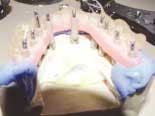
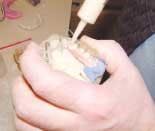
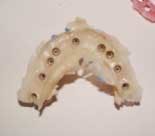
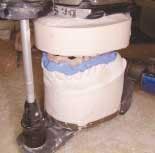
The duplicate denture is relieved on the interior to allow it to be placed on the cast without interference and still articulate with the upper cast. The denture is luted to the upper cast with hot glue (figure 10). The denture is indexed to the lower cast utilizing a stiff polyvinyl bite registration material (figure 11). The denture is modified to allow clearance for the cylinders and returned to the cast using the index (figure 12). Temporary cylinders are placed on the lower cast (figure 13). Cold-cure Jet Acrylic is injected around the cylinders and denture to fill the spaces (figure 14). The denture is wrapped with elastics and placed in a pressure pot to cure. Following curing, the denture is removed from the cast by unscrewing the cylinders (figure 15). The denture is now formed to become a fixed provisional by grinding away the excess acrylic (figure 16).
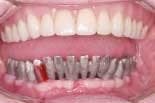
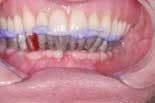
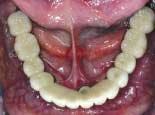
The fixed provisional restoration is placed in the mouth and screwed in place. The vertical dimension is confirmed and the occlusion adjusted. The screw holes are sealed with low viscosity polyvinyl impression material (figures 17 and 18).
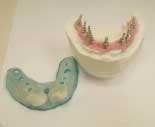
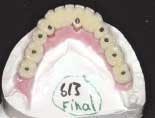
Following a three-month period for integration, the patient returns for the final restoration. Prior to this appointment, the open tray impression copings are placed on the preliminary cast and a custom tray fabricated (figure 19). A polyvinyl bite registration is made prior to removal of the provisional. When the provisional is removed, open tray impression copings are placed on the abutments and a polyether impression taken. Once the cast is set, the provisional restoration is screwed on the cast (figure 20) and the cast mounted against the upper cast (figure 21). Models of the provisional are made and the provisional is returned to the mouth. The case is sent to the lab for fabrication (figure 22).
It is advisable to have a framework try-in. Before porcelain is added to the restoration, the three restorations are tried in the mouth (figure 23). Utilizing only one screw, the fit is checked for passivity. In this case, the anterior restoration did not fit precisely. This framework was sectioned and indexed with GC pattern resin (figure 24). A bite registration was taken to confirm the mounting and the case returned for finishing (figure 25).
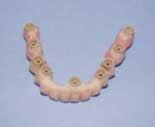
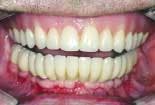
When the final restorations are received from the lab, they are inspected on the mounted models (figures 26 and 27). The final restoration is placed in the mouth and screwed in place. The access holes are filled with Clip, pink opaque composite and tooth-colored composite (figures 28 and 29). Final occlusal adjustments are made and esthetics confirmed (figure 30).
Utilization of the lower denture as a fixed provisional allowed for immediate loading of the dental implants. As well as allowing the patient to forgo the need to wear a lower denture, it also helps the restoring dentist in production of the final prosthesis. A fixed provisional lets us confirm the vertical dimension, occlusal scheme, and phonetics. The transition from the fixed provisional to the final restoration is then simple, requiring only a couple of appointments.
Author’s Note: Dr. Saby would acknowledge the support of Dr. Brian Kucey of Alberta Implant Centres for his excellent handling of the surgical phase of this case and Mr. Andy Nguyen of Aesthetic Creations in Calgary for his masterful casting and porcelain work.
Editor’s Note: References available upon request. This is the fourth of a yearlong series of articles from the American Academy of Cosmetic Dentistry (AACD). The AACD and Dental Equipment & Materials are working together to provide articles that will help your practice. For more information about the AACD, log on to www.aacd.com or call (800) 543-9220.
Dr. Brian Saby is a fellow of the Academy of General Dentistry, an accreditation examiner, and an accredited member of the American Academy of Cosmetic Dentistry. He maintains a cosmetic and restorative practice in Red Deer, Alberta, Canada, and can be contacted at [email protected].
Excerpt from May 2004 Dental Economics article, “The economics of implants.” To read more of the article, visit www.dentaleconomics.com
Implant dentistry is rapidly becoming a preferred mode of permanent-tooth replacement for many patients in clinical situations. Increasingly, patients demand implant-supported restorations in lieu of fixed or removable partial dentures. Yet there is still a gap between the numbers of implant procedures performed in the United States and the number of teeth to be replaced. In a May 2002 Dental Economics article, author Jeffrey Ganeles, DMD, discussed economic and professional issues that address trends toward implant dentistry. Factors identified to permit and encourage this shift include:
→ personal confidence and successful experiences of the dentist with implant dentistry, creating a positive belief in the process;
→ an ability to communicate to patients the benefits of implant dentistry;
→ reduction or elimination of complications, warranty work, and problem solving using appropriate planning, accurate surgical procedures, and efficient laboratory techniques;
→ application of evidence-based decision-making principles to treatment planning and patient education; and
→ an ability to profitably deliver implant dentistry at similar or better margins than conventional alternatives.
Despite logical and economic arguments for implant dentistry, a common concern for patients and dentists is the anticipation that implant dentistry will be a time-consuming, drawn-out process. The belief stems from professional education traditions. Classically, dentists were taught that osseointegration - the biological connection between living bone and dental implants - required three to nine months of stress-free healing. Other requisite conditions specified in the 1980s and early 1990s included submucosal healing, surgical placement in a sterile operating-room environment, and lack of radiographs during healing.
Marketing opportunity
Incorporating immediate loading and restoration of dental implants benefits the marketing program of a practice. It defines the office as providing cutting edge, patient-oriented treatment. Providing these services shows that the dentist and staff are listening to patient desires and finding new methods to meet those demands predictably, scientifically, and safely.
Eliminating treatment obstacles such as time, anxiety, and unpredictability permits patients to accept treatment proposals for necessary and elective procedures. When presented with desirable, comprehensive treatment proposals, patients often find methods to afford the large expense. Financing options can be justified by the lifespan of the proposed restorations, measured in decades instead of a few years.


