Digital cameras: A difficult decision
By Lorne Lavine, DMD
In the September/October issue of Dental Equipment & Materials, we looked at intraoral cameras and the criteria that offices should use in choosing a system. In some situations, however, the intraoral camera is not the ideal choice. While images from a good intraoral camera can be diagnostic, they are often not adequate for cosmetic imaging cases, communication with labs, or for documenting certain situations. In these scenarios, an extraoral (digital) camera would be a better choice. While they were, at one time, more expensive than intraoral cameras, a good extraoral camera can now be found for about one-half the price of the better intraoral systems. In this article, we will look at extraoral cameras, methods of converting existing images, and ways to get these images onto paper or other media.
Extraoral cameras
While intraoral cameras have many benefits, there have always been some roadblocks for dentists who wished to use them in the office. There is a learning curve associated with their use; most have a mirror image, so using them is similar to using a mirror in the mouth. The earlier units had a tendency to fog up, and you need to use a disposable sheath between every patient. The units also tend to still be on the expensive side, and better models still sell in the $5,000-7,000 range for the basic system. What most dentists wanted was a way to use cameras that they are already familiar with, which is the extraoral camera. The problem, for a long time, was the unavailability of digital cameras. While there are many ways to get traditional photos into a digital format (more on that later), it is still much more desirable and easier to have digital images from the start.
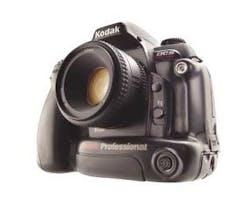
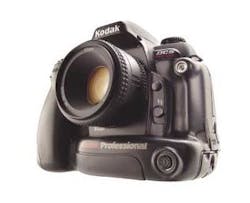
When the first digital cameras for consumer use were introduced, they were very expensive and, while suitable for the home, did not meet the criteria for producing diagnostic dental photographs. The first units that came out were 1.3-megapixel cameras. Since then, we have seen 2.1-megapixel units, 3.3-megapixel units, and lately, 5-, 6-, and even 14-megapixel cameras (the Kodak DCS Pro 14n — seen at right — was released in January).
A short primer on pixels
It helps to remember that pixel count doesn't determine how good the image will be on the monitor. It only applies to 1) how far you can zoom in on the image without a loss of resolution, and 2) how large a good print you can make. Image quality is determined more by lens quality, the imaging chip and its control circuitry, etc., not to mention the ability of the photographer to control those factors. To put the "how big" issue in some kind of perspective, the rule of thumb I use is that (with a continuous-tone print device such as a dye-sub or good quality ink-jet printer) you need to provide 300 pixels per inch in the print to provide high-quality photographic results — ones that will stand up to close scrutiny and still look photographic. If you can settle for "snapshot" photo quality, i.e. images that will be examined casually at normal reading distance or better, then you can get by with 200 pixels per inch in the print, and for "display" quality, meaning prints that will be viewed from several feet away, you're OK with 100 pixels per inch or even less. (Keep in mind that these quality levels are strictly my own personal preferences. Some people might be perfectly happy with 50-pixels-per-inch images!)
null
Anyway, if you have a 2-megapixel camera (typically about 1200x1600 pixels in the image), the biggest print you can make and retain what I think of as "high quality" is 4x6 inches. A 3-megapixel camera (let's assume it'll be 1500x2000 image pixels) will let you make a print of 5x7 inches at the same high-quality level. That's a difference of about an inch each way. If your usual need is for "snapshot" quality, you can bump up these figures by 50 percent. Either way, I think it makes it pretty clear that the 5- and 6-megapixel cameras won't make a big difference, unless you plan to print 8x10 photos; the image on the computer monitor screen will look the same whether you are using a 2-, 3-, or 6-megapixel camera. Or, to put it another way, if you have a choice of a 3-megapixel camera that's perfect for your needs and preferences, or a 6-megapixel camera that would force you to compromise on the features and controls you want, don't buy the 6-megapixel model just because it has more pixels! Even in those situations where you are zooming in on a tooth on the monitor screen, I've found that a 4-megapixel camera will allow you to blow that image up to a size where it fills the entire screen without any loss of resolution or image quality.
When you are evaluating digital camera systems, I would recommend that you work with a company that specializes in systems designed for the dentist. Two well-known companies are Photomed and Lester A. Dine. Both produce systems that include all the hardware and software that a dentist would need to get started in digital photography, although they take different approaches and have subsequently different costs of their systems. The Photomed systems are typically 4-megapixel cameras with all components included, such as macro lens, flash diffuser or ring flashes, memory cards, and battery charger. These systems normally start around $1,800 and can go as high as $6,000 depending on the camera type and attachments that you purchase. The Lester A. Dine system, by comparison, modifies the flash next to the lens for the appropriate amount of macro lighting, so no ring or point flashes are needed. Their systems also use a 3.3- or 4-megapixel camera body and costs run from about $1,700-2,500, depending on the model.
From analog to digital
For many dentists, the transition to digital photography is exciting and opens up many new possibilities. The difficulty for most, however, is trying to figure out how to digitize their current photos and slides. There are a number of methods of getting your prints and slides onto a computer, where they can then be manipulated and output to different sources:
Photo or Picture CD — For film that hasn't been developed or with negatives, you can ask the photo developer to put your images on a Photo or Picture CD. These CDs can be read by all but the most ancient CD-ROM players, and can then be downloaded onto your computer's hard drive.
Scanner — This is currently the only method for getting existing photos or slides into a digital format. I would recommend that when you search for a scanner; find one that has both a backlight and a transparency adapter. Models that I have found to be particularly good are the UMAX Astra 4000U and the Epson Expression 1680 Professional Series. You should look for a scanner that has the highest dpi (dots per inch) resolution that you can afford. Better models have at least a 1200x2400 dpi; the Epson, for example, has a 1600x3200 dpi resolution.
Online — There are numerous online companies that offer online storage and scanning of existing photos. Companies such as Ofoto.com and Kodak Picture Center Online are excellent ways to store digital images, although they don't offer scanning of existing photos. While these online services are an option, they are hardly the cheapest! Expect to pay from $1-10 per scan, which can get very expensive if you have hundreds of photos to be scanned.
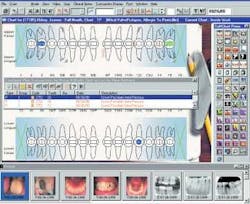
Once you find a method of getting your analog or digital photos and slides on to a computer, you need to have some method of storing, cataloging, and manipulating these images. The only method before true integration became a reality was to use a stand-alone image-management program. Some of the better and more popular ones are Apteryx Xva3, Mediadent, Vipersoft, Dicom Imaging Suite, Tigerview, and SciCan Image FX. As dental practice-management software has evolved, there was a need to find a way to integrate these image databases with the management program, so most of the developers of these programs built "bridges." Most bridges, however, are still one-way, in that you can call up the image-management program from the patient screen, and all that patient information will already be transferred. However, this method does not allow images that you capture to be transferred back to the patient file in the practice-management program. To accomplish this, you need true integration. This type of integration is found with some of the more prevalent programs, such as Dentrix DDO, Softdent (pictured at right), and Eaglesoft One Patient Record.
Output
Once you have access to your images and have manipulated them to your liking, the final piece in the puzzle is to determine how you want to output these photos. Obviously, this will depend a lot on how you plan to utilize the images, such as patient presentations, dental lab communication, lectures, insurance documentation, or online collaboration. Some of the various choices include:
Inkjet printers — It is important to use a printer that is not only capable of printing medical-quality images, but using the right paper is also important. An example of a good quality printer is the Kodak 1200 Desktop Medical Imager, which lists for about $450. I also like the Canon S900, which retails for around $299. The paper and supplies will tend to be more expensive for these types of printers; ink cartridges run about $50 and a high-quality paper costs 50-60 cents per page.
null
CD Writer — Most new computers come with CD burners, known as CD-R and CD-RW drives. These drives are capable of writing the images (or any other files you designate) directly to the CD-ROM, so that you can easily send the CD through the mail or make backup copies for yourself. There are now DVD burners as well, but, since a standard format has not yet been established, I would recommend holding off on purchasing one at this time.
Removable media — There are many types of removable media that can be used, depending on the amount of storage capacity needed. Some of these options include floppy disks, Zip disks, and tape backup. The newest, and easiest, are removable hard drives, which can store up to 250 GB of data — often three or four times the size of the computer's hard drive!
Email — Once you have a digital image, any email program will allow you to attach files to be emailed. You should ensure that the images are in a standard format that can be read by other programs and, just as importantly, that the files are compressed. An image created with a 3.3-megapixel camera can be many megabytes in size. Converting this to a JPEG file (these are files that have the .jpg extension on the end) will reduce them to 500-750k on average. Keep in mind that most people still use a dial-up connection to the Internet, and downloading large files can be very time-consuming, so compressing the images makes a lot of sense. Also realize that email is a very insecure method of sending files. Anyone who has ever had a virus sent by an email knows what I am talking about.
Online collaboration — There are many services that will allow you to upload your digital files to a site that will store and catalog these files for viewing by other people. The most basic ones, which are not necessarily designed for dental applications, are quite easy to use and most are free of charge. Sites that are built around online dental collaboration, such as Transcend Online and Digitalightbox.com are excellent examples of this technology.
The world of digital photography has continued to grow over the past couple of years, and this is to the advantage of the dentist. Prices will continue to drop, image quality continues to improve, and the products and systems are becoming easier and easier to use. For any dentist considering the addition of digital photographs to his or her dental practice, the time to take the plunge is now!
Dr. Lorne Lavine has practiced periodontics and implant dentistry since 1992. He is an A+ Certified Computer Repair Technician as well as Network+ Certified. He is the president of Dental Technology Consultants, which assists dentists in all phases of technology integration in the dental practice. He can be reached via his Web site at www.dtc4u.com, by e-mail at [email protected] or toll-free at (877) 851-0297.


