Fabrication of a chairside custom dental impression coping for fixture-level impressions
While we all are fascinated with the ease of intraoral scanning, there is still a need for fixture-level impressions when it comes to home-run esthetics in the anterior. The scan bodies of digital dentistry do not support the soft-tissue contours developed by our full-contour, screw-retained temporaries fabricated at the time of dental implant placement. Also disappointing are the stock round impression copings the implant companies supply to us. Neither transfer solution provides support for the soft-tissue contours we have spent four to six months developing with our custom temp. For this reason, I follow a quick and time-efficient method to fabricate a custom tissue-supporting matrix chairside to preserve my soft-tissue well and papilla, and transmit those contours to the lab in a fixture-level impression.
A custom tissue-supporting impression matrix reproduces the soft-tissue contours of our case very nearly exactly as they exist around our full-contour temps. No longer do our ceramists have to guess about the free gingival margins due to round transfer assemblies allowing our soft tissue to sag while I seat the coping, verify seat with a radiograph, and finally record the final impression. The results of this extra 10 minutes of preparation are anterior cases with more predictable soft-tissue outcomes.
ALSO BY DR. C. MIKE MEEK | Anterior dental implant cases: Fixed temporaries for greater case acceptance and better soft-tissue outcomes
Outlined below are the simple steps I use to turn a stock transfer assembly into a custom impression matrix. This should only add about 10 minutes of chair time to your impression appointment and requires only some bite registration material or fast-set PVS, an implant analog(s), a medicine cup, and flowable composite.
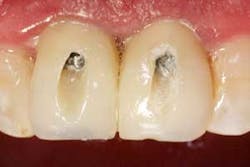
The patient will present four to six months’ postop with full-contour temps securely fastened to the now-osseointegrated fixtures.
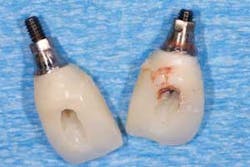
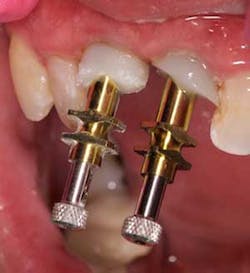
Access your vent holes of the titanium temporary abutments and remove the temps with the appropriate driver. On these Nobel Biocare Active Conical Connection implants, the UniGrip Driver was my tool of choice (figures 1 and 2).
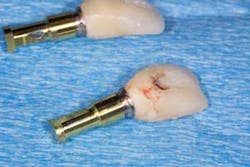
Attach the temps to the corresponding implant analog (figure 3). In this case, the gold, regular-platform implant replica was used. This will allow quick fabrication of a “master cast” for our custom coping fabrication.
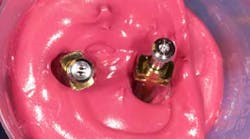
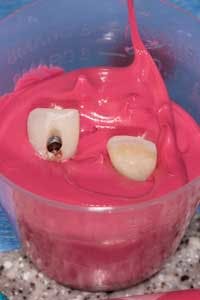
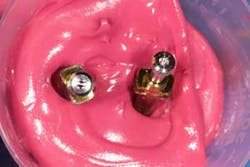
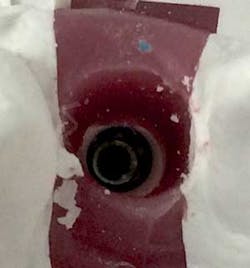
Fill a medicine cup with quick-set PVS material and quickly plunge the analog and temporary into the material (figure 4). Seat the assemblies about one-third the length of the clinical crown into the impression material and allow it to set. I like 30-second setting materials, such as Capture by Glidewell, to save chair time. You can also use any regular-set PVS material, and go do a hygiene check!
MORE READING |Make a good first impression: A guide to accurate full-arch implant impressions
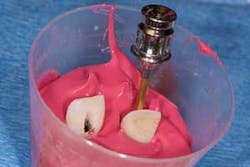
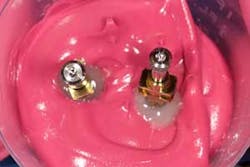
Once set, remove the temps from the analogs in your quickly created master cast using the appropriate driver (figure 5). Merely hand tighten. Too much torque will rip the analog from the material, and you will lose the timing of the temp to the implant.
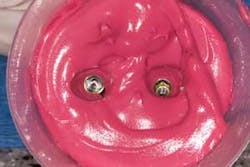
You will find a nice negative of your temps (figure 6). A helpful hint is to mark the buccal aspect on the impression prior to removing the temps, so that you’ll know better the orientation of your impression coping when you take it to the mouth. That was not done for this case.
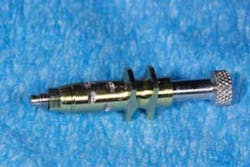
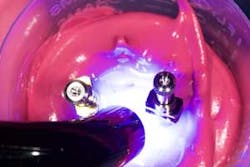
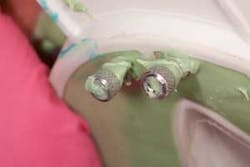
Next, seat the correct size impression transfer assembly onto the analogs (figures 7 and 8). I used open-tray assemblies for this case. Closed trays will work as well, but I prefer the benefits of the open-tray impression. Be sure to use a high-speed diamond bur, and score and roughen the shaft of the transfer assembly so the composite matrix will lock around the assembly and not spin, losing its timing.
Using flowable composite, fill the voids around the copings (figures 9 and 10). Take care not to create voids, and light cure.
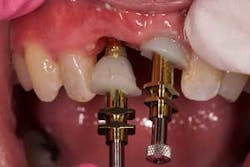
Once cured, removed the assemblies from the makeshift master cast, and insert them onto the implant fixtures (figures 11 and 12). Verify seat of the transfer assemblies with a radiograph to ensure that you will have accuracy in your lab work.
The seated and verified transfer assemblies should show the nice soft-tissue contours for the lab to duplicate in the soft-tissue model.
I recorded the final open-tray impression using a Mira-Tray by Hager Werken (figure 13). These trays have proven to be extremely useful in allowing the greater accuracy of an open-tray impression with the speed and ease of a closed-tray protocol.
Replace your temps and mend the access with composite (figure 14).
Ship your case to the lab and know that there will be no guesses as to where the crest of the free gingival margin lies on your case (figure 15). I have found that my ceramists are elated to find that I took time and cared enough to make this matrix for them. It has catalyzed increased effort at providing me with more beautiful esthetic outcomes for my cases.
Given that this “extra” step only requires about an additional five to 10 minutes of chair time, I cannot see why a practitioner interested in ultimate esthetics would not follow this suggestion. I have made it a standard for all implant impressions in the anterior sextant. As a bonus, restorations will adapt perfectly to the soft tissue well, making local anesthesia and releasing incisions for anterior screw-retained restorations such as the NobelProcera Angulated Screw Channel (ASC) Crown an exception and not the rule. In addition, patients find the process fascinating, and it builds cache around my practice and its work with dental implants.
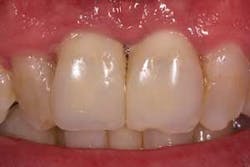
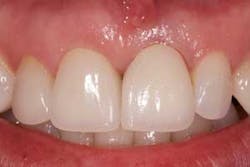
This final photo is a single No. 8 restored with the NobelProcera ASC restoration using a conventional fixture-level impression and the custom tissue-supporting matrix (figure 16). The gingival symmetry was a nice result of care in planning the case. The fact that the patient did not require local anesthesia to deliver was icing on the cake!
